Accessing your Linux VPS (Virtual Private Server) is crucial for managing your applications, databases, and files. While there are numerous SSH clients available, Bitvise SSH Client stands out for its user-friendly interface and powerful features. This article will guide you through the process of Login to a Linux VPS using Bitvise SSH Client, ensuring secure and efficient management of your server.
What is Bitvise SSH Client?
Bitvise SSH Client is a robust, reliable tool for SSH connectivity. It offers a graphical interface, making it an excellent choice for users who prefer not to work exclusively with command-line tools. It supports key management, SFTP file transfers, and tunneling, providing a comprehensive solution for remote server management.
Step-by-Step Guide to Logging in to Your Linux VPS Using Bitvise SSH Client
Step 1: Download and Install Bitvise SSH Client
Visit the Bitvise SSH Client download page and download the installer.
Run the installer and follow the on-screen instructions to install the software on your Windows machine.
Step 2: Launch Bitvise SSH Client
Open Bitvise SSH Client from your Start menu or desktop shortcut.
The main interface will appear, where you will configure your connection settings.
Step 3: Configure Connection Settings
Host and Port:
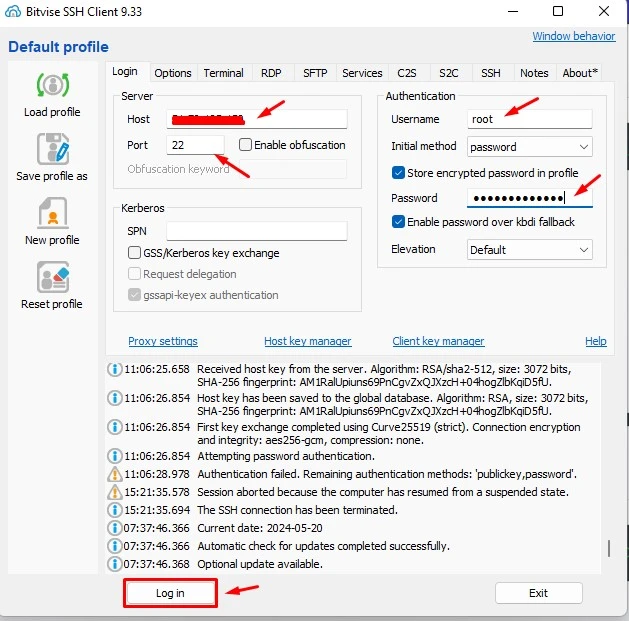
In the “Host” field, enter the IP address of your Linux VPS.
In the “Port” field, enter the SSH port of your VPS (default is 22).
Authentication:
Username: Enter your SSH username (commonly root or another specified user).
Initial method: Select “password” if you are using password authentication or “public key” if you are using an SSH key.
Password Authentication:
If you choose “password” under “Initial method”, enter your password in the “Password” field.
Public Key Authentication:
If you choose “public key”, click the “Manage” button next to “Client key manager”.
In the “Client Key Manager” window, click “Load” to add your private key file.
Select the private key file (typically id_rsa or similar) from your computer.
Step 4: Save Profile (Optional but Recommended)
To save your configuration for future use, click the “Save profile” button.
Enter a name for your profile and save it. This allows you to quickly connect to your VPS without re-entering the details every time.
Step 5: Connect to Your VPS
Once all the details are entered, click the “Log in” button.

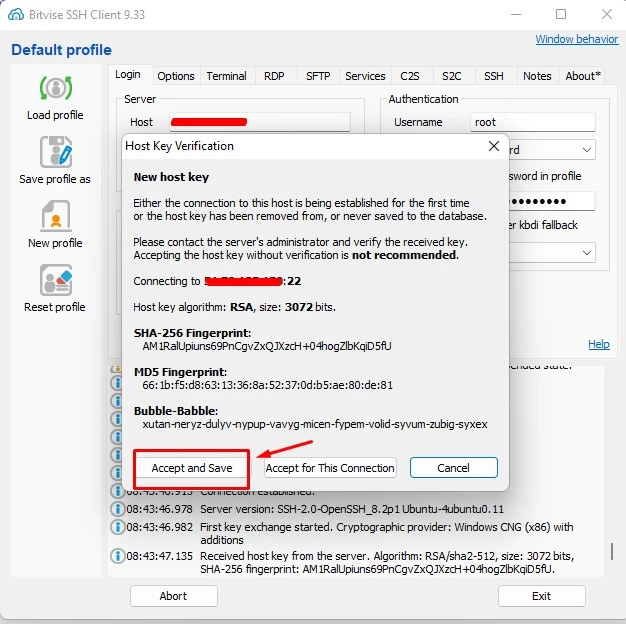
Bitvise SSH Client will initiate the connection to your VPS. If this is your first time connecting to the server, you might see a prompt to verify the server’s host key. Accept the key to proceed.

Step 6: Using Bitvise SSH Client
Terminal Access:
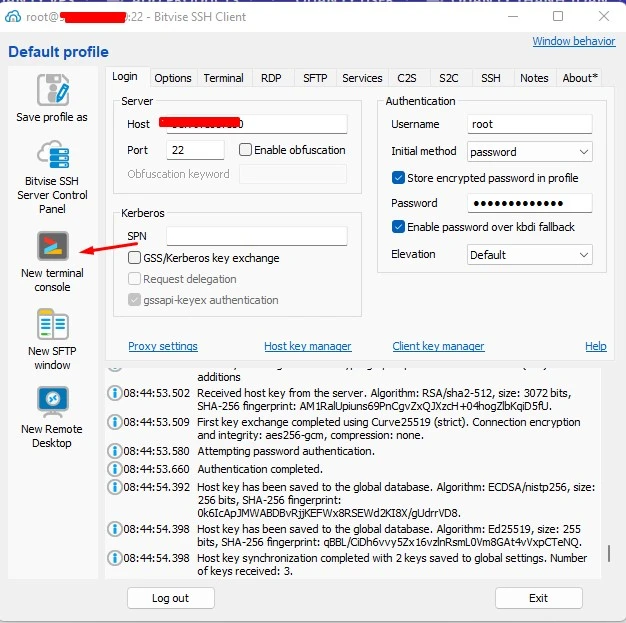
After logging in, you will have terminal access to your Linux VPS. You can execute commands, manage files, and configure your server directly from the terminal interface provided by Bitvise.
SFTP File Transfers:
Bitvise SSH Client also includes an SFTP client. Click on the “New SFTP Window” button to open the SFTP interface, where you can upload, download, and manage files on your VPS with ease.

Conclusion
Login to a Linux VPS using Bitvise SSH Client is straightforward and efficient, thanks to its user-friendly interface and comprehensive features. By following the steps outlined in this guide, you can securely manage your VPS, ensuring optimal performance and accessibility. Whether you’re a novice or an experienced user, Bitvise SSH Client offers the tools you need for effective remote server management.
Remember to keep your SSH credentials secure and regularly update your SSH keys and passwords to maintain the highest level of security for your VPS. With Bitvise SSH Client, managing your Linux VPS has never been easier.

