PuTTY is a free and open-source terminal emulator, serial console, and network file transfer application. Originally developed by Simon Tatham for the Windows platform, PuTTY supports several network protocols, including SSH (Secure Shell), Telnet, rlogin, and SCP (Secure Copy Protocol). It is widely used by system administrators, developers, and IT professionals to manage and configure remote servers securely. This guide explains PuTTY’s features, how to install PuTTY on Windows, Linux, and macOS, and is perfect for IT professionals and developers.
What is PuTTY?
PuTTY is more than just a simple terminal emulator. It provides users with a powerful set of tools to connect to remote servers securely. Let’s take a closer look at what PuTTY offers:
1. SSH Client
First and foremost, PuTTY is most commonly used as an SSH client. SSH is a protocol that allows you to securely connect to a remote server over an unsecured network. By using SSH, you can perform tasks like managing files, running commands, and configuring servers as if you were physically present at the machine.
2. Telnet Client
In addition to SSH, PuTTY supports Telnet, which was widely used before SSH became the preferred protocol for secure communication. Although Telnet is less secure, PuTTY supports it for legacy systems that still require Telnet access.
3. Serial Console
Moreover, PuTTY can also be used as a serial console. This feature is particularly useful for managing network devices, such as routers and switches, where you might need to connect via a serial port.
4. File Transfer Protocols
Additionally, PuTTY includes tools like PSCP and PSFTP, which allow secure file transfer between local and remote machines. PSCP is a command-line tool for copying files using SCP, while PSFTP is an interactive SFTP client.
5. Cross-Platform Compatibility
Lastly, while PuTTY was initially developed for Windows, it has since been ported to various operating systems, including Linux and macOS. This cross-platform compatibility makes it a versatile tool for IT professionals working in diverse environments.
Why Use PuTTY?
PuTTY is widely adopted for several reasons:
- Security: PuTTY supports strong encryption algorithms, making it a secure choice for remote server management.
- Versatility: With support for multiple protocols and functionalities, PuTTY serves as an all-in-one tool for network communication.
- Lightweight: PuTTY is a small and efficient application, making it ideal for quick installations and use on machines with limited resources.
- Customizability: Users can configure sessions, save profiles, and customize the terminal appearance to fit their preferences.
- Community Support: Being open-source, PuTTY benefits from a large community of users and developers who contribute to its improvement and provide support.
![]()
How to Install PuTTY on Windows
Installing PuTTY on a Windows machine is a straightforward process. Here’s a step-by-step guide to help you get started:
Step 1: Download PuTTY
First, Click here to visit the official download page of PuTTY. On the homepage, you’ll find download links for various versions of PuTTY. Select the appropriate version for your operating system. Most Windows users will choose the 64-bit installer (putty-64bit-<version>.msi). Once you’ve selected the version, click the download link to save the installer to your computer.
Step 2: Run the Installer
After downloading, navigate to the folder where you saved the installer. Double-click the .msi file to start the installation process. The PuTTY Setup Wizard will open; click “Next” to proceed.
Step 3: Select Installation Path
Next, the wizard will prompt you to choose an installation path. The default location is usually fine for most users, but you can change it if needed. After selecting the installation path, click “Next.”
Step 4: Choose Components
The setup wizard will then ask you to select the components you want to install. By default, all components are selected, including PuTTY, PSCP, PSFTP, and more. You can customize the installation by selecting or deselecting components, but it’s generally recommended to install all components. Click “Next” to continue.
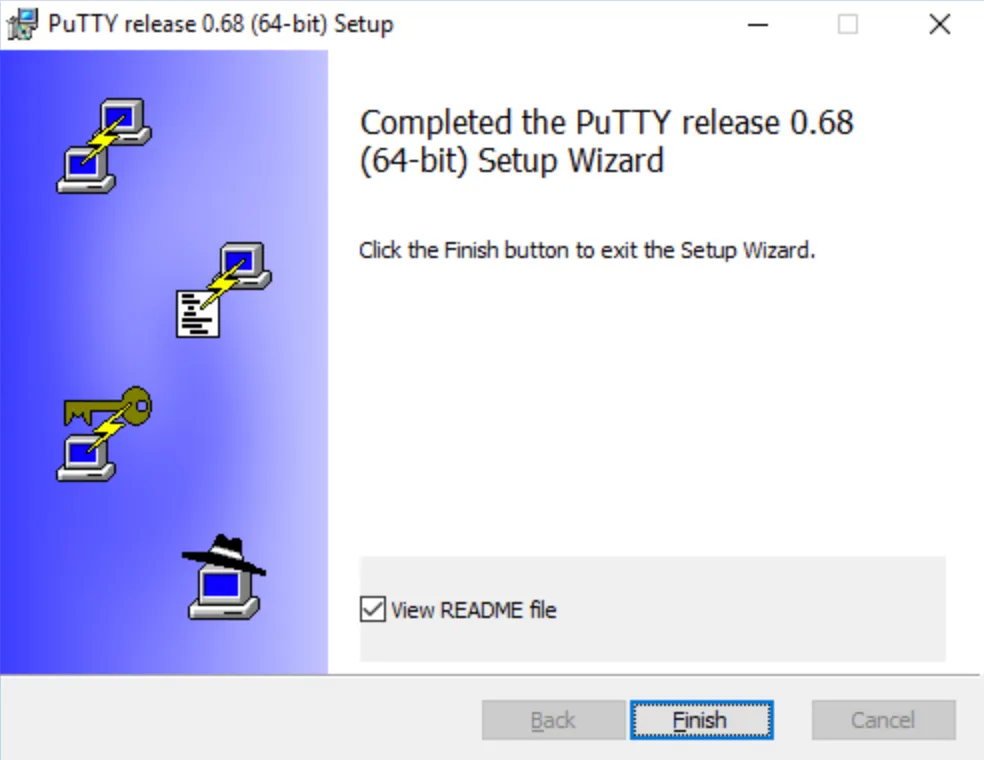
Step 5: Complete the Installation
Now, the wizard will install PuTTY on your computer. This process should only take a few seconds. Once the installation is complete, click “Finish” to exit the wizard.
Step 6: Launch PuTTY
Finally, after installation, you can launch PuTTY by searching for it in the Start menu or by navigating to the installation directory. Click on the PuTTY icon to open the application.
How to Install PuTTY on Linux
PuTTY is also available for Linux distributions. While many Linux users prefer native terminal applications, PuTTY can be installed for those who are more comfortable with it. Here’s how:
Step 1: Open the Terminal
First, open the terminal on your Linux machine. You can do this by searching for “Terminal” in your applications menu or by pressing Ctrl + Alt + T.
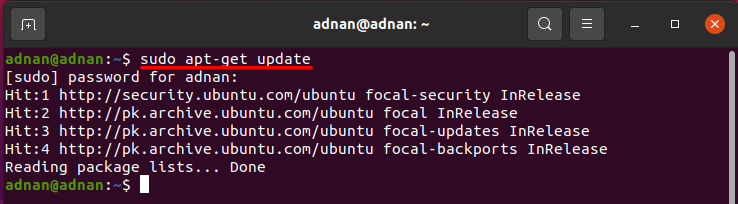
Step 2: Update the Package List
Before installing PuTTY, it’s a good idea to update your package list. Enter the following command:
sudo apt-get update
This ensures you have the latest list of available packages.
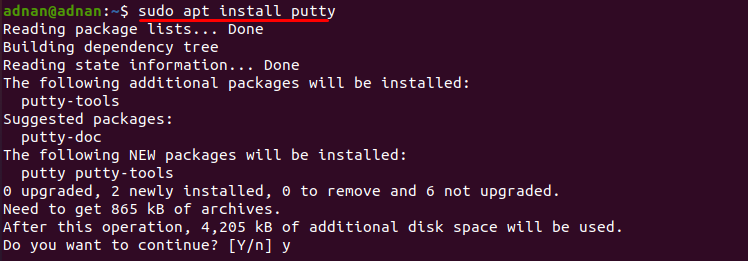
Step 3: Install PuTTY
Once the package list is updated, you can install PuTTY by entering:
sudo apt-get install putty
The terminal will prompt you to confirm the installation. Type Y and press Enter to proceed.
Step 4: Launch PuTTY
After the installation is complete, you can launch PuTTY by typing:
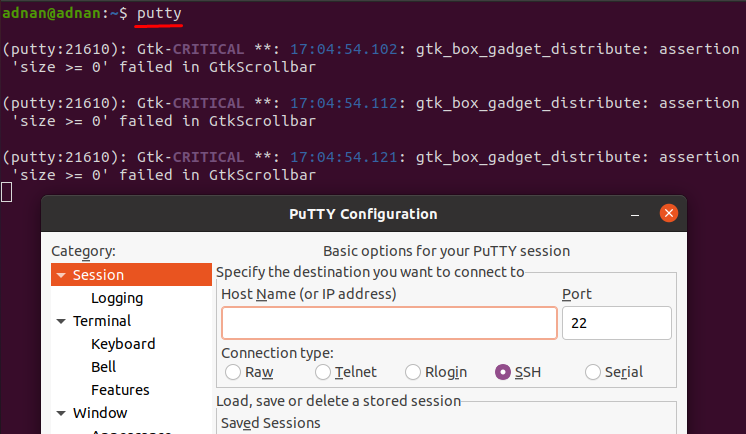
putty
in the terminal and pressing Enter. PuTTY will open, and you can start using it to manage your remote servers.
How to Install PuTTY on macOS
PuTTY can also be installed on macOS, although it’s not as commonly used as on Windows. Here’s how to install PuTTY on a Mac:
Step 1: Install Xcode Command Line Tools
First, you need to install the Xcode Command Line Tools. Open the Terminal and enter:
xcode-select –install
Follow the prompts to complete the installation.
Step 2: Install Homebrew
Homebrew is a package manager for macOS that simplifies the installation of software. If you don’t have Homebrew installed, you can install it by entering:
/bin/bash -c “$(curl -fsSL https://raw.githubusercontent.com/Homebrew/install/HEAD/install.sh)”
Follow the on-screen instructions to complete the installation.
Step 3: Install PuTTY
Once Homebrew is installed, you can install PuTTY by running:
brew install putty
This command will download and install PuTTY on your Mac.
Step 4: Launch PuTTY
After the installation, you can launch PuTTY by typing:
putty
in the Terminal.
How to Use PuTTY
Once installed, PuTTY is easy to use for managing remote servers. Here’s a quick guide:
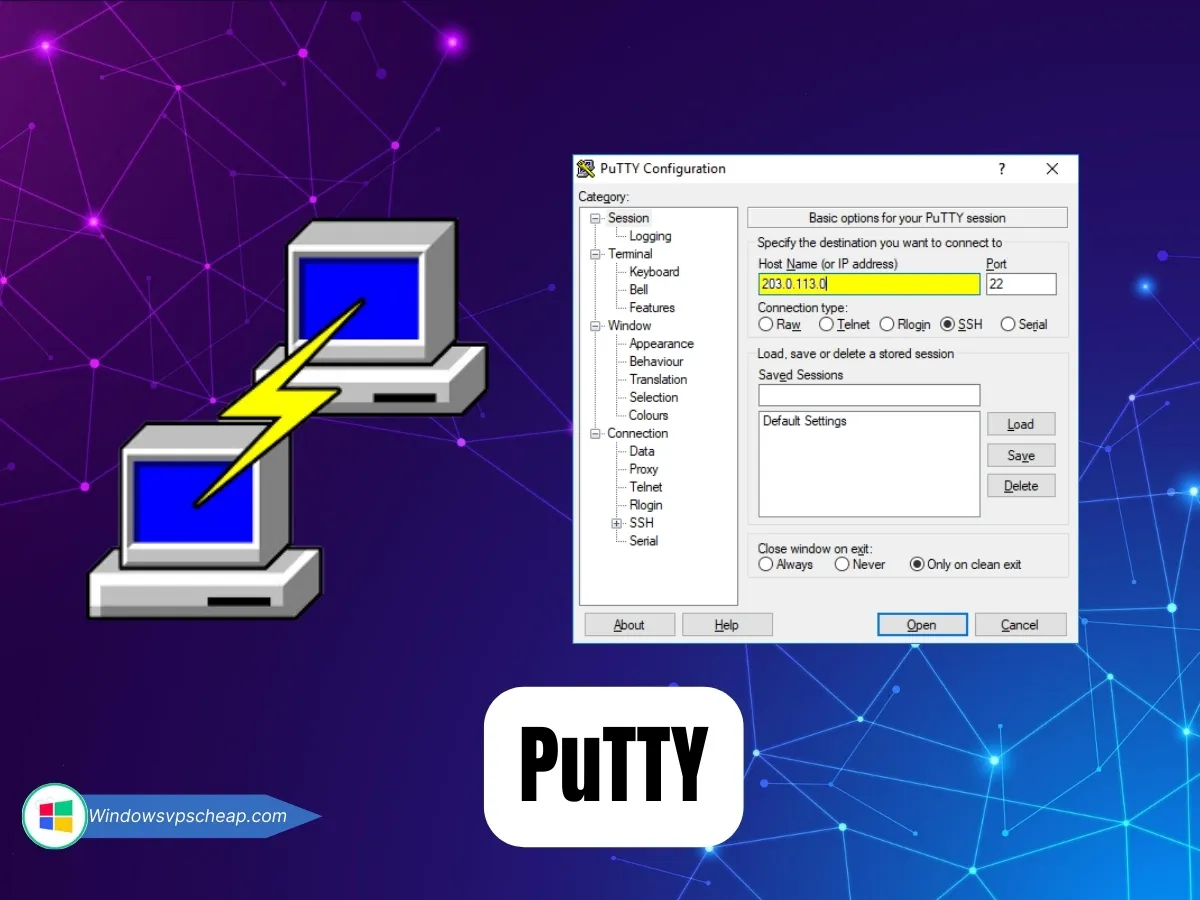
Step 1: Configure the Connection
Open PuTTY and enter the hostname or IP address of the remote server in the “Host Name (or IP address)” field. Select the connection type. By default, SSH is selected, but you can choose Telnet, Rlogin, or other supported protocols.
Step 2: Customize Settings (Optional)
Before connecting, you can customize various settings, such as the terminal appearance, logging options, and connection-specific settings. To save these settings for future use, enter a name in the “Saved Sessions” field and click “Save.”
Step 3: Connect to the Server
Click “Open” to start the connection. If you’re connecting to the server for the first time, PuTTY will display a security alert. Confirm the connection by clicking “Yes.” You’ll be prompted to enter your username and password to log in.
Step 4: Manage the Remote Server
Once logged in, you can execute commands, transfer files, and manage the remote server just as if you were using a local terminal.
Conclusion
In conclusion, PuTTY is an essential tool for anyone who needs to manage remote servers securely and efficiently. Its versatility, security features, and ease of use make it a go-to application for IT professionals and developers worldwide. Whether you’re using Windows, Linux, or macOS, installing and using PuTTY is straightforward, allowing you to connect to remote systems quickly and securely.
By following the steps outlined in this guide, you’ll be able to install PuTTY on your preferred operating system and start using it to manage your remote servers with ease. Whether you’re an experienced system administrator or just getting started, PuTTY is a valuable addition to your toolkit.
Thank you for following the blog of WindowsVPSCheap. We hope you found this information helpful in understanding PuTTY and its uses. For more in-depth tutorials and tips on Linux, VPS Linux, and other server-related topics, be sure to keep following our blog. We appreciate your ongoing support and look forward to bringing you more valuable content!
CATEGORY:Linux VPS
