If you’re looking to optimize your Android app experience on a PC, Bluestacks is a powerful emulator that can help. Running multiple instances of Bluestacks on a GPU server can significantly enhance performance and efficiency. In this guide, we’ll walk you through the process of downloading Bluestacks and setting it up to run multiple instances on a GPU server.
Why Use Bluestacks5?
Bluestacks is one of the most popular Android emulators, known for its user-friendly interface and robust performance. It allows you to run Android apps and games on your PC, providing a seamless experience with enhanced graphics and controls.
Bluestacks 5 is the latest release from the venerable Android emulator. It is developed in the United States following the highest data security standards, while also retaining GDPR compliance. Consequently, BlueStacks is the best product not only for playing Android games on your PC, but also for doing so while staying safe and protected from would-be attackers or shady business practices.
What is a GPU Server?
A VPS (Virtual Private Server) GPU is a type of virtual server that includes dedicated GPU (Graphics Processing Unit) resources. Unlike standard VPS that relies solely on CPU (Central Processing Unit) for processing tasks, a VPS with GPU capabilities is equipped with powerful graphics processors. This setup provides enhanced computational power, especially for tasks that require significant graphical processing such as rendering, video encoding, and running complex simulations.
A server GPU (Graphics Processing Unit) is a specialized hardware component designed to handle and accelerate graphic rendering and parallel processing tasks in a server environment. Unlike consumer GPUs, server GPUs are built to operate in data centers and enterprise-level infrastructures, providing high performance, reliability, and scalability for demanding workloads.
Recommended Requirements for BlueStacks 5
- OS: Microsoft Windows 10 and above
- Processor: Intel or AMD Multi-Core Processor with Single Thread benchmark score > 1000
- Graphics: Intel/Nvidia/ATI, Onboard or Discrete GPU with benchmark score >= 750
- RAM: 8GB or higher
- Storage: SSD (or Fusion/Hybrid Drives)
- Internet: Broadband connection to access games, accounts and related content.
- Virtualization is enabled on your PC/Laptop.
- You can Install BlueStacks 5 even if you have a virtual machine such as Microsoft Virtual PC, VMWare Workstation, or Oracle Virtualbox, installed on the same PC. However, please note that you may run into some performance issues.
Benefits of Running Multiple Instances
Increased Productivity: Running multiple instances allows you to use several apps simultaneously.
Enhanced Performance: Utilizing a GPU server can offload processing tasks from the CPU, ensuring smoother operation.
Better Resource Management: Manage and allocate resources effectively to avoid lags and crashes.
Step-by-Step Guide to Download Bluestacks
Follow the steps given below to download and install BlueStacks on Windows:
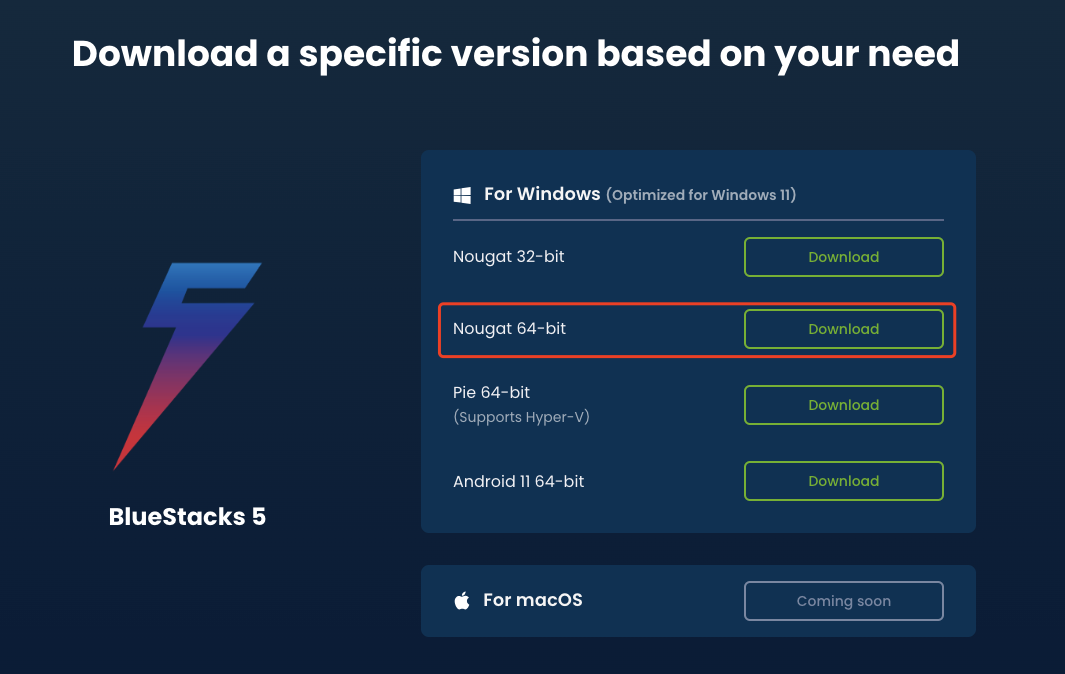
Step 1: Click here to visit the official download page of BlueStacks. Download a specific version based on your need, let’s download BlueStacks 5.
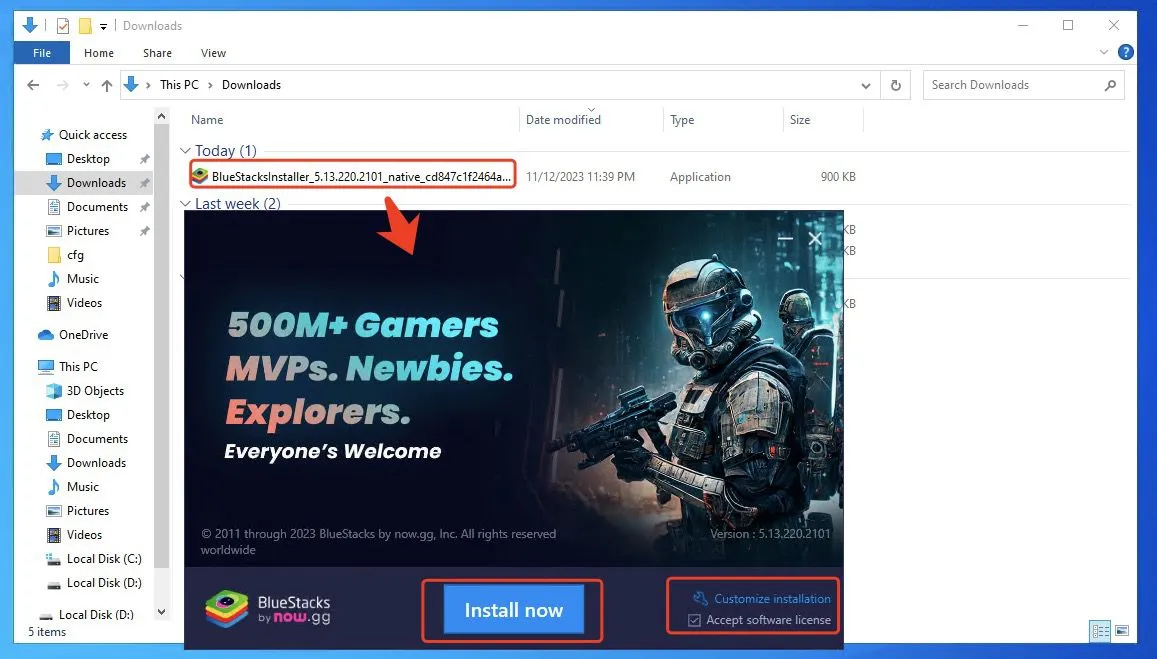
Step 2: As soon as the download completes, double click on the installation file and start the installation process.
Step 3: After completing the installation process, you will need to sign in with your Google play store account. On opening the BlueStacks, you will see a Google play store icon. Click on it to proceed further.
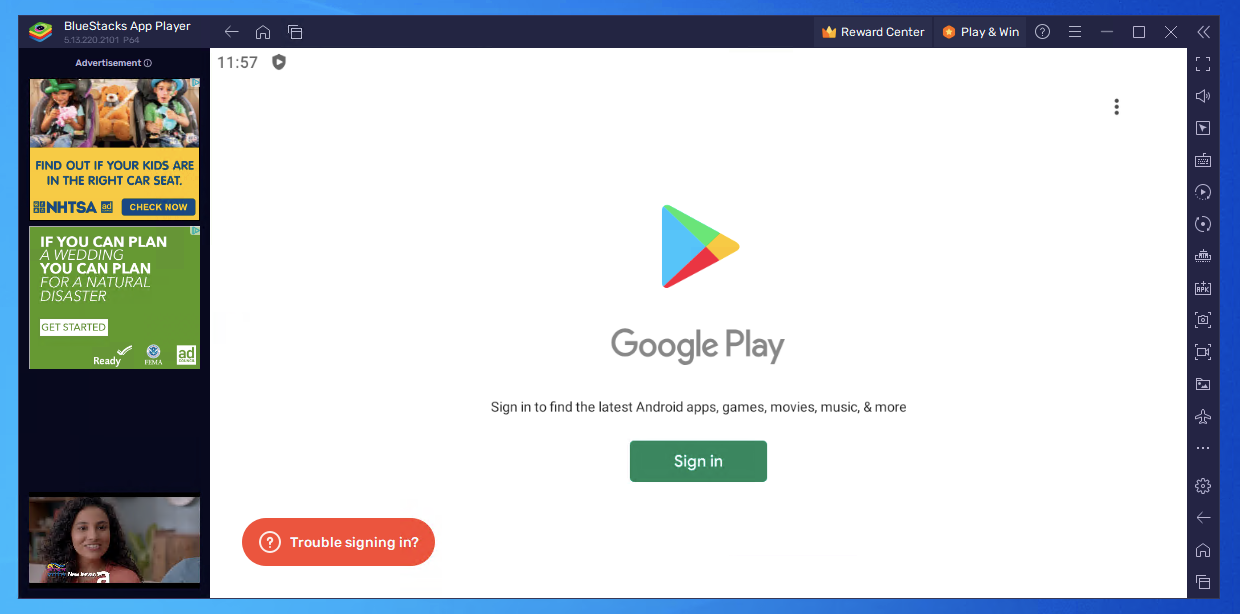
Step 4: Enter your user id and password, and then click on the Next button. Agree with the terms & conditions of the Google play store.
That’s all! With this, you’ve successfully installed the BlueStacks 5 on your Windows PC. Now, you can easily download any application from the play store and use it on your Windows computer.
Setting Up Multiple Instances on a GPU Server
Enable Virtualization: Ensure that virtualization is enabled on your PC. This is crucial for running multiple instances smoothly. You can enable it through the BIOS settings.
Install GPU Drivers: Make sure you have the latest GPU drivers installed to leverage the GPU’s full potential.
Launch Bluestacks Multi-Instance Manager: Open Bluestacks and click on the Multi-Instance Manager button.
Two shortcuts will be generated on the desktop after installation, one for single-instance mode and one for multi-instance mode. The interface of the software opened in the two modes is different, as shown in the following figure.

Create New Instances: Click on ‘Instance‘ and configure the settings as per your requirements.
Instance Type: Choose fresh or cloned instance.
Performance Settings: Allocate CPU cores and RAM. For GPU acceleration, make sure to check the ‘Use dedicated computer graphics’ option.
It’s very important to allocate enough RAM and CPU cores to your Android emulator. Your emulator need to make use of the assigned resources to power up the apps you launch inside the emulator. Changing the RAM and CPU cores settings can significantly increase the performance of BlueStacks on your server.

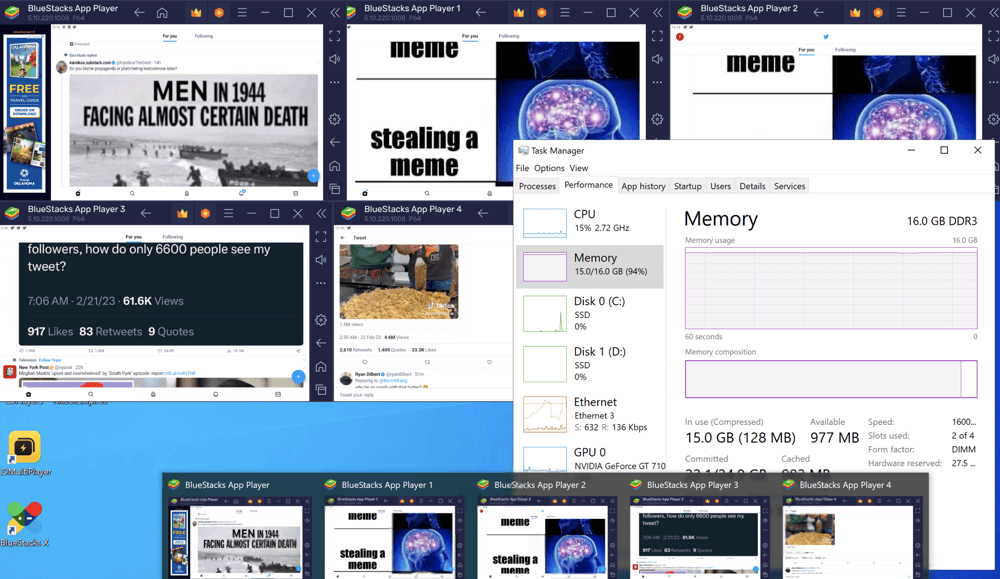
Start Instances: Once configured, start the instances. They will run simultaneously, utilizing the GPU for better performance. GT710 Server Test Screenshots Running 5 Bluestacks instances:
Running multiple instances of Bluestacks on a GPU server can greatly enhance your Android app experience on a PC. By following this guide, you can easily download and set up Bluestacks, enabling you to multitask efficiently and enjoy superior performance.
Optimizing Performance
Update Bluestacks Regularly: Keep Bluestacks updated to the latest version to benefit from performance improvements and new features.
Monitor Resource Usage: Use task manager or resource monitor tools to keep an eye on CPU, GPU, and RAM usage.
Adjust Instance Settings: Tweak the performance settings based on your system’s capabilities to ensure optimal performance.
Common Uses of Server GPUs
Artificial Intelligence and Machine Learning:
Training Models: Server GPUs accelerate the training of machine learning models by handling the large-scale computations required.
Inference: GPUs speed up the process of running trained models to make predictions or classifications.
Data Analytics:
Big Data Processing: Server GPUs can process large datasets more quickly than CPUs, enabling faster data analysis and insights.
Real-Time Analytics: The parallel processing power of GPUs supports real-time data analytics applications.
Scientific Computing:
Simulations and Modeling: High-performance GPUs are used for complex simulations and modeling tasks in fields like physics, chemistry, and biology.
Research: Server GPUs facilitate various research activities that require significant computational resources.
Graphics Rendering:
3D Rendering: GPUs are essential for rendering high-quality 3D graphics in industries like film, gaming, and virtual reality.
Visualization: Server GPUs enable advanced visualization techniques for complex data sets.
Virtual Desktop Infrastructure (VDI):
Enhanced User Experience: Server GPUs provide the necessary graphical power for virtual desktops, ensuring a smooth and responsive user experience.
Resource Sharing: GPUs enable multiple users to share graphical resources efficiently in a VDI environment.
Server GPUs are powerful tools designed to handle the intensive computational and graphical demands of modern data centers and enterprise environments. They provide high performance, scalability, and reliability for a wide range of applications, including AI, machine learning, data analytics, scientific computing, graphics rendering, and virtual desktop infrastructure. By leveraging the parallel processing capabilities of server GPUs, organizations can achieve faster processing times, improved efficiency, and enhanced user experiences.
Conclusion
Server GPUs are powerful tools designed to handle the intensive computational and graphical demands of modern data centers and enterprise environments. They provide high performance, scalability, and reliability for a wide range of applications, including AI, machine learning, data analytics, scientific computing, graphics rendering, and virtual desktop infrastructure. By leveraging the parallel processing capabilities of server GPUs, organizations can achieve faster processing times, improved efficiency, and enhanced user experiences.
WindowsVPSCheap.com offers GPU server solutions that are optimized for running Android emulators. These servers are equipped with powerful graphics processing units (GPUs) to ensure high performance and smooth operation of Android applications. The GPU servers provided by WindowsVPSCheap.com are designed to handle the intensive graphics and processing demands of Android emulators, ensuring a seamless user experience and reliable performance. For more details, you can visit website and explore the various plans and features available for we GPU server offerings. Chat with our experts at any time.
By leveraging the power of GPUs and the flexibility of GPU Server, installing Bluestacks on this platform not only simplifies the process but also benefits users tremendously. This will undoubtedly change the way we experience Android games and apps on our PCs. This article has given you an overview and details on how to use GPU Server to install Bluestacks, and the application benefits bring, we hope that you will have a wonderful and enjoyable experience exploring the world of Android on your big screen!
>>> You may be interested in: How to Install LDPlayer 9 on GPU Server and Run Multiple LDPLayer Instances
CATEGORY:GPU Servers for Android Emulator GPU VPS
