Remote Desktop Connection Manager (RDCMan) is a networking tool that allows users to manage multiple desktops remotely. It is a comprehensive and practical application that is essential when you need to manage and organize multiple connections. With its help, you can merge your remote connections into a single and intuitive window so you can prevent clutter on your desktop.
More importantly, this app allows you to organize all server labs. It saves all the connection details in its main window every time you need to connect remotely to a specific computer. Once you’ve created and assigned individual names to a team, you can add as many servers as needed. Although there are many similar applications out there, what makes Remote Desktop Connection Manager different is that it can create multiple groups and sessions in a single interface. However, the app has limited support for managing remote sessions in addition to those connected from it.
Install the Remote Desktop Connection Manager software.
To manage all VPS at the same time, you can follow the steps below:
First, you need to install the Remote Desktop Connection Manager software.
Download link: Download (Official Microsoft link).
After downloading, you install from the .exe file in the folder (just select next to install the software)
Step 1: Open the software and create a file to save information about the VPS.
Select File -> New
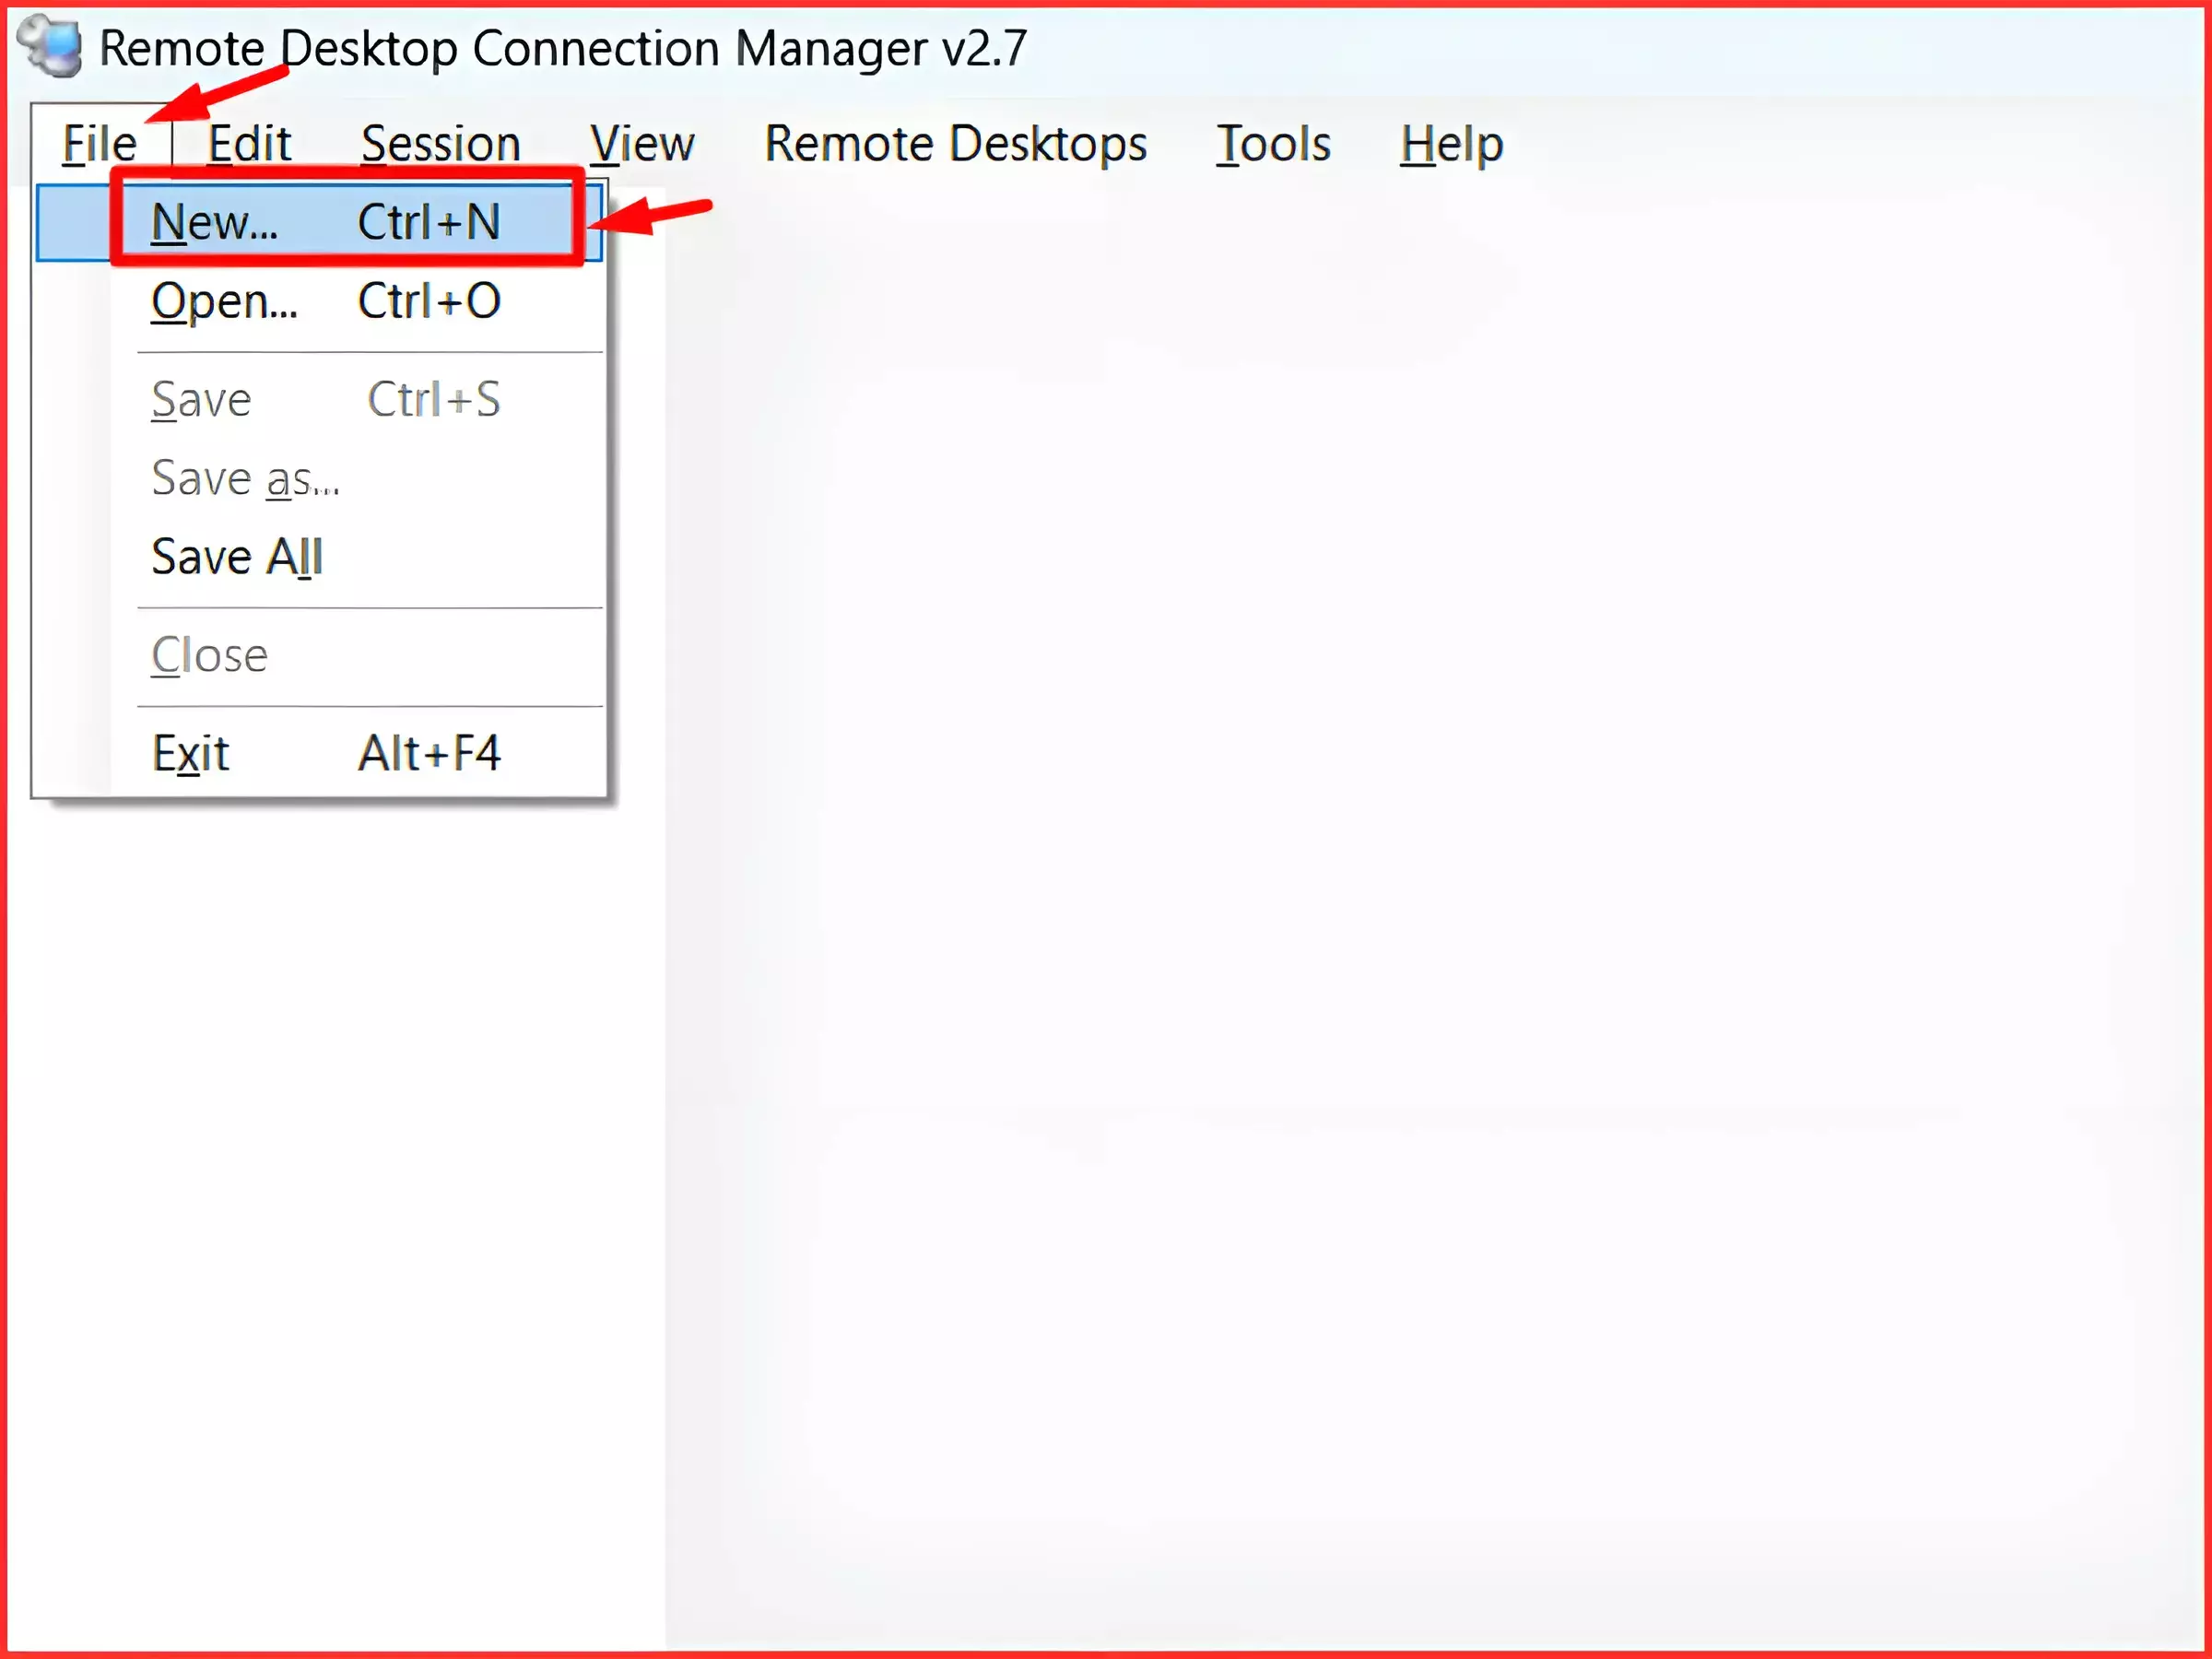
When the window appears, you choose where the information is stored and name the file, then save it. So you have created a group to manage many VPS with something in common.
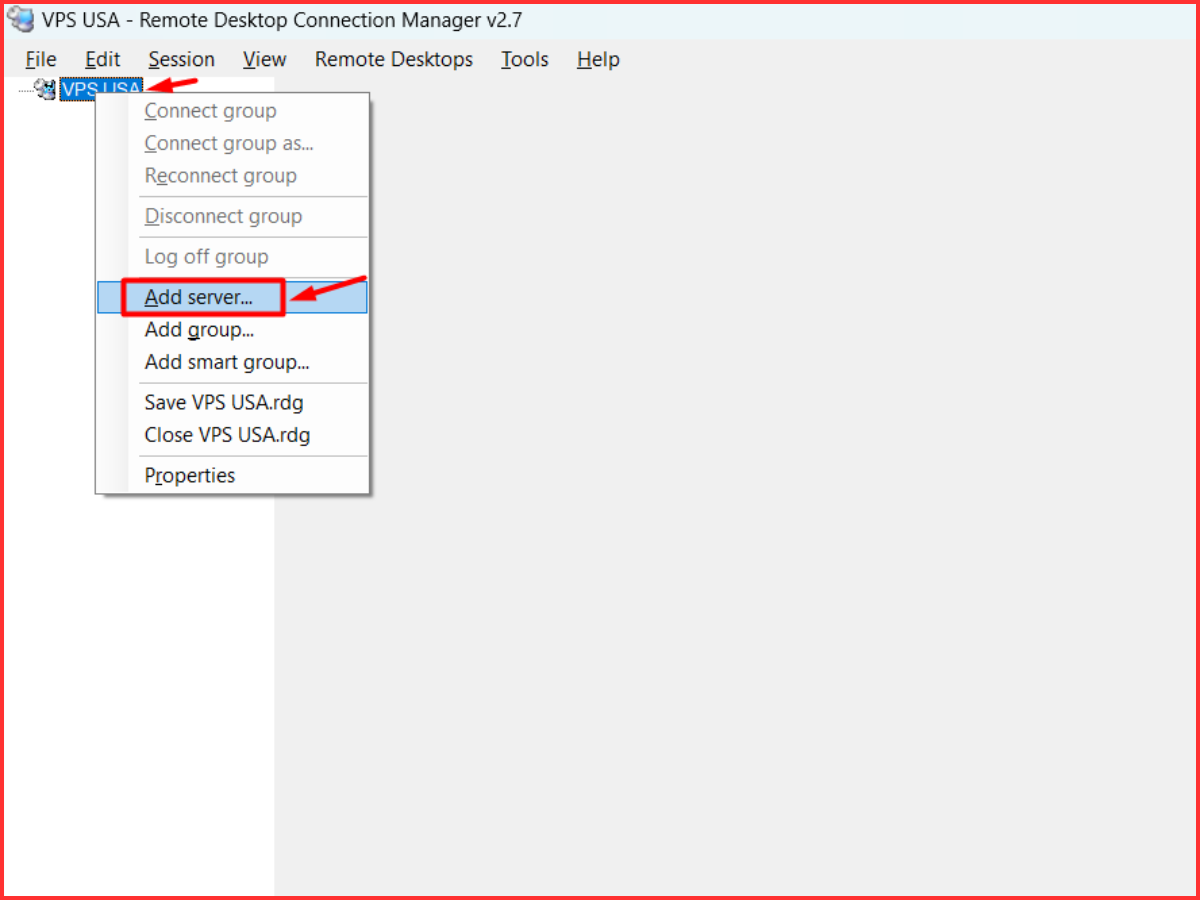
Step 2: Add server and connect
Right-click on the file name and select Add Server
In the Server Settings section, enter the VPS IP into the Server name and Display name (usually set to always be the IP).
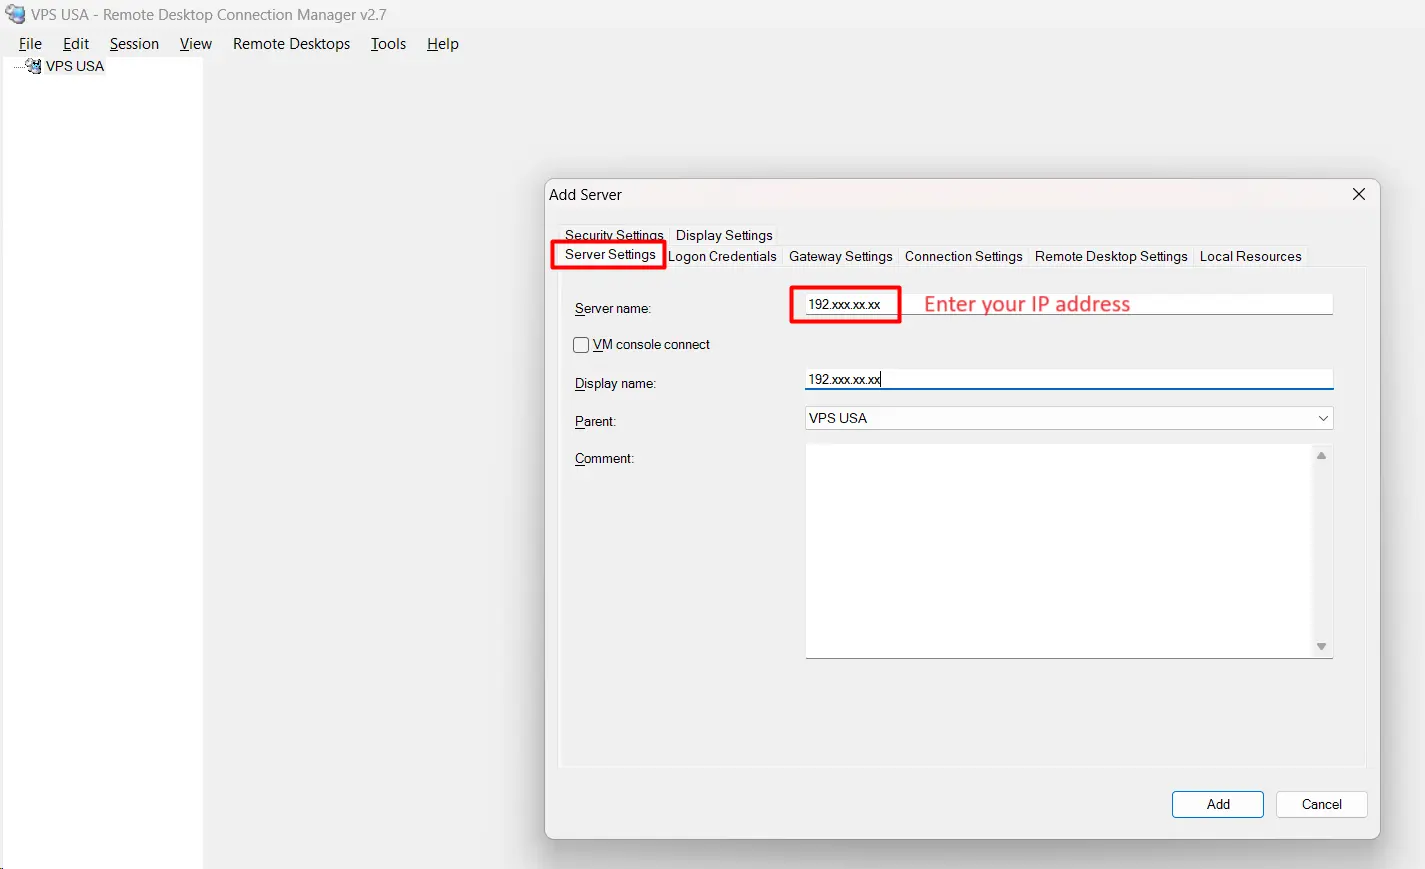
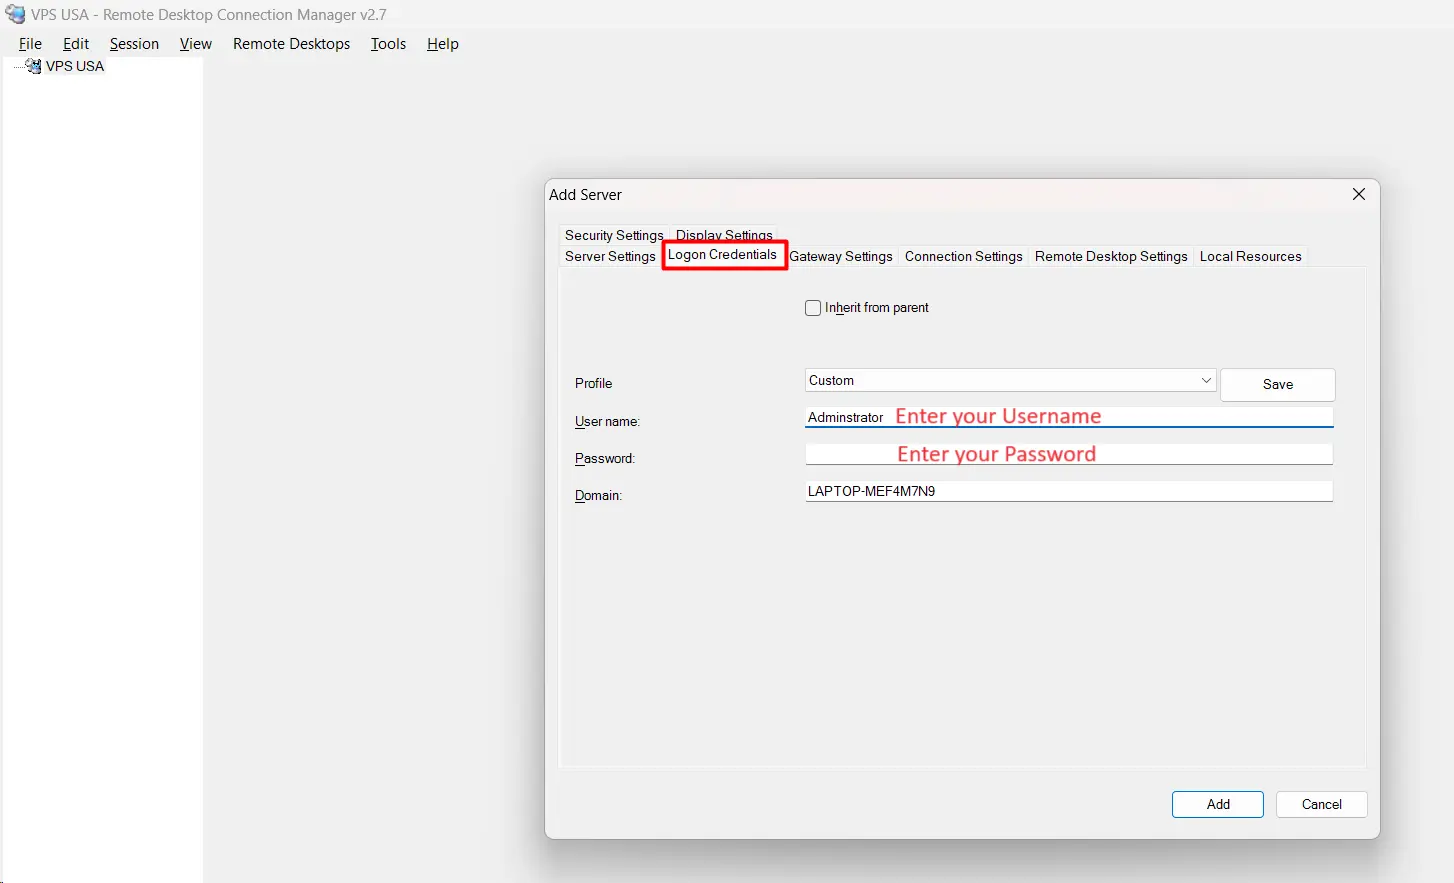
Switch to the Login Credentials tab to enter the VPS login account.
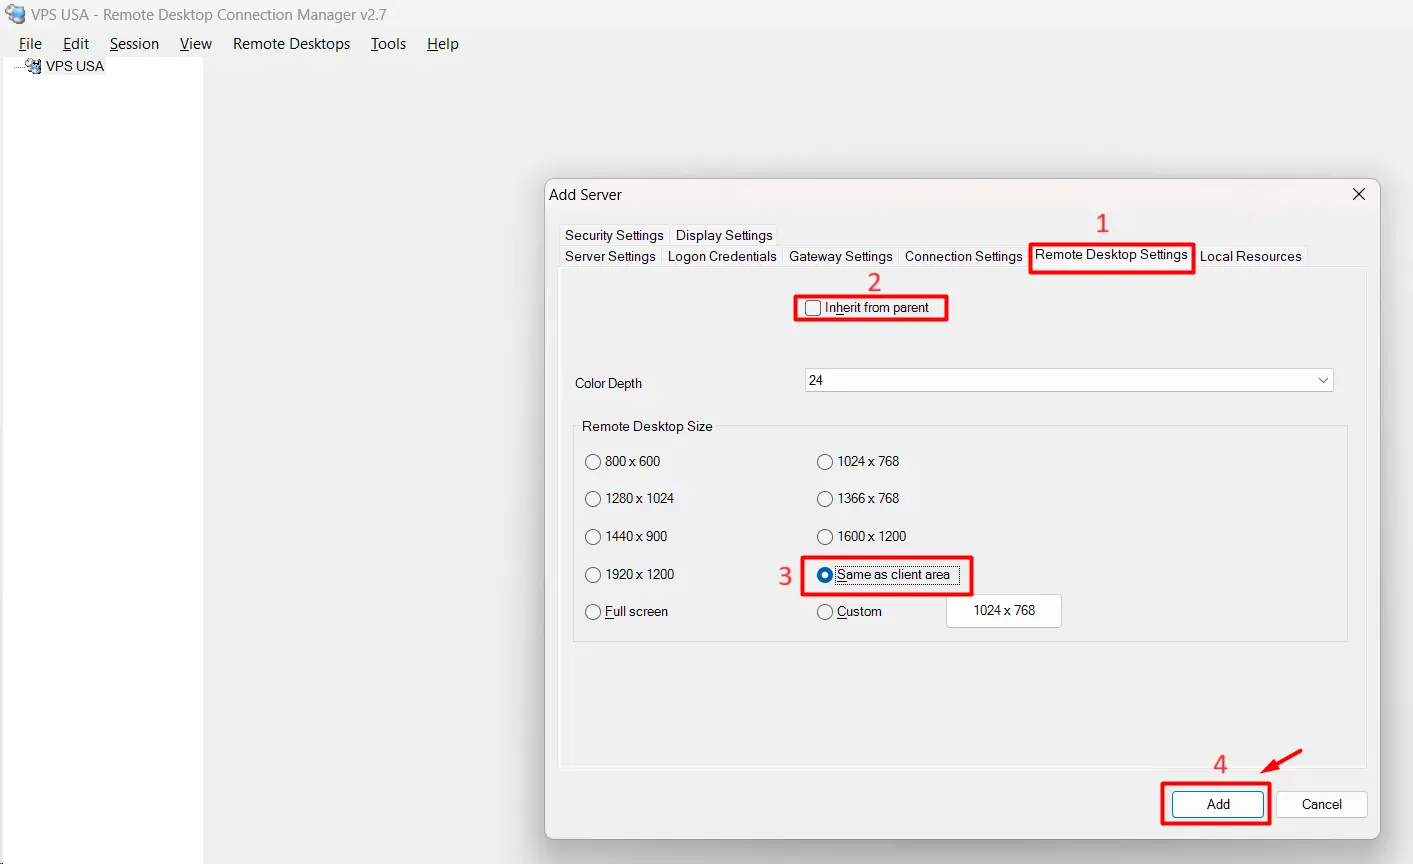
Set the size, and resolution of VPS at Remote Desktop Settings, click Same as client area -> Add to finish the VPS adding process.
Step 3: Connect to VPS
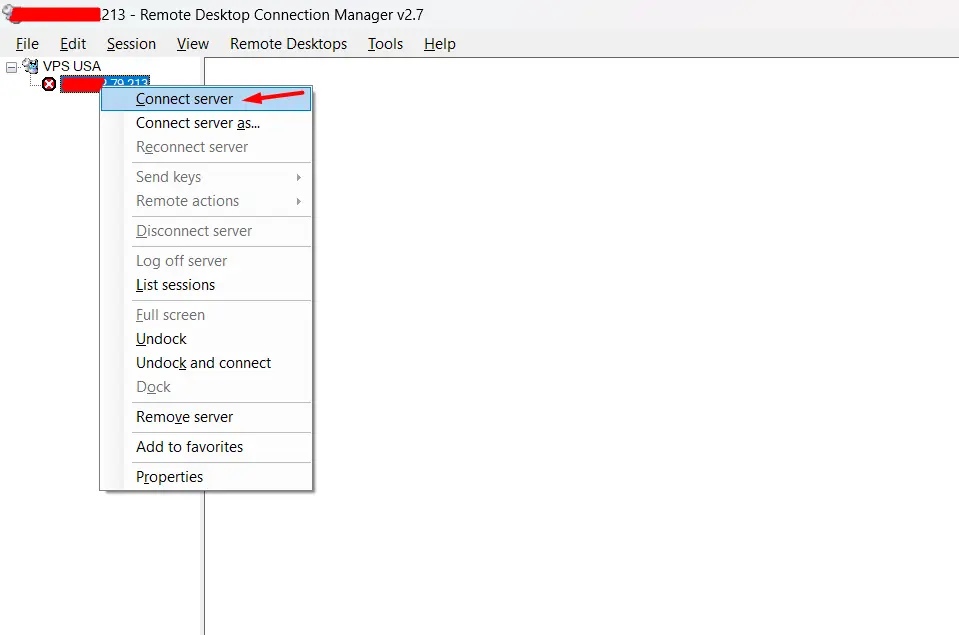
Right-click on the newly added VPS and select Connect server.
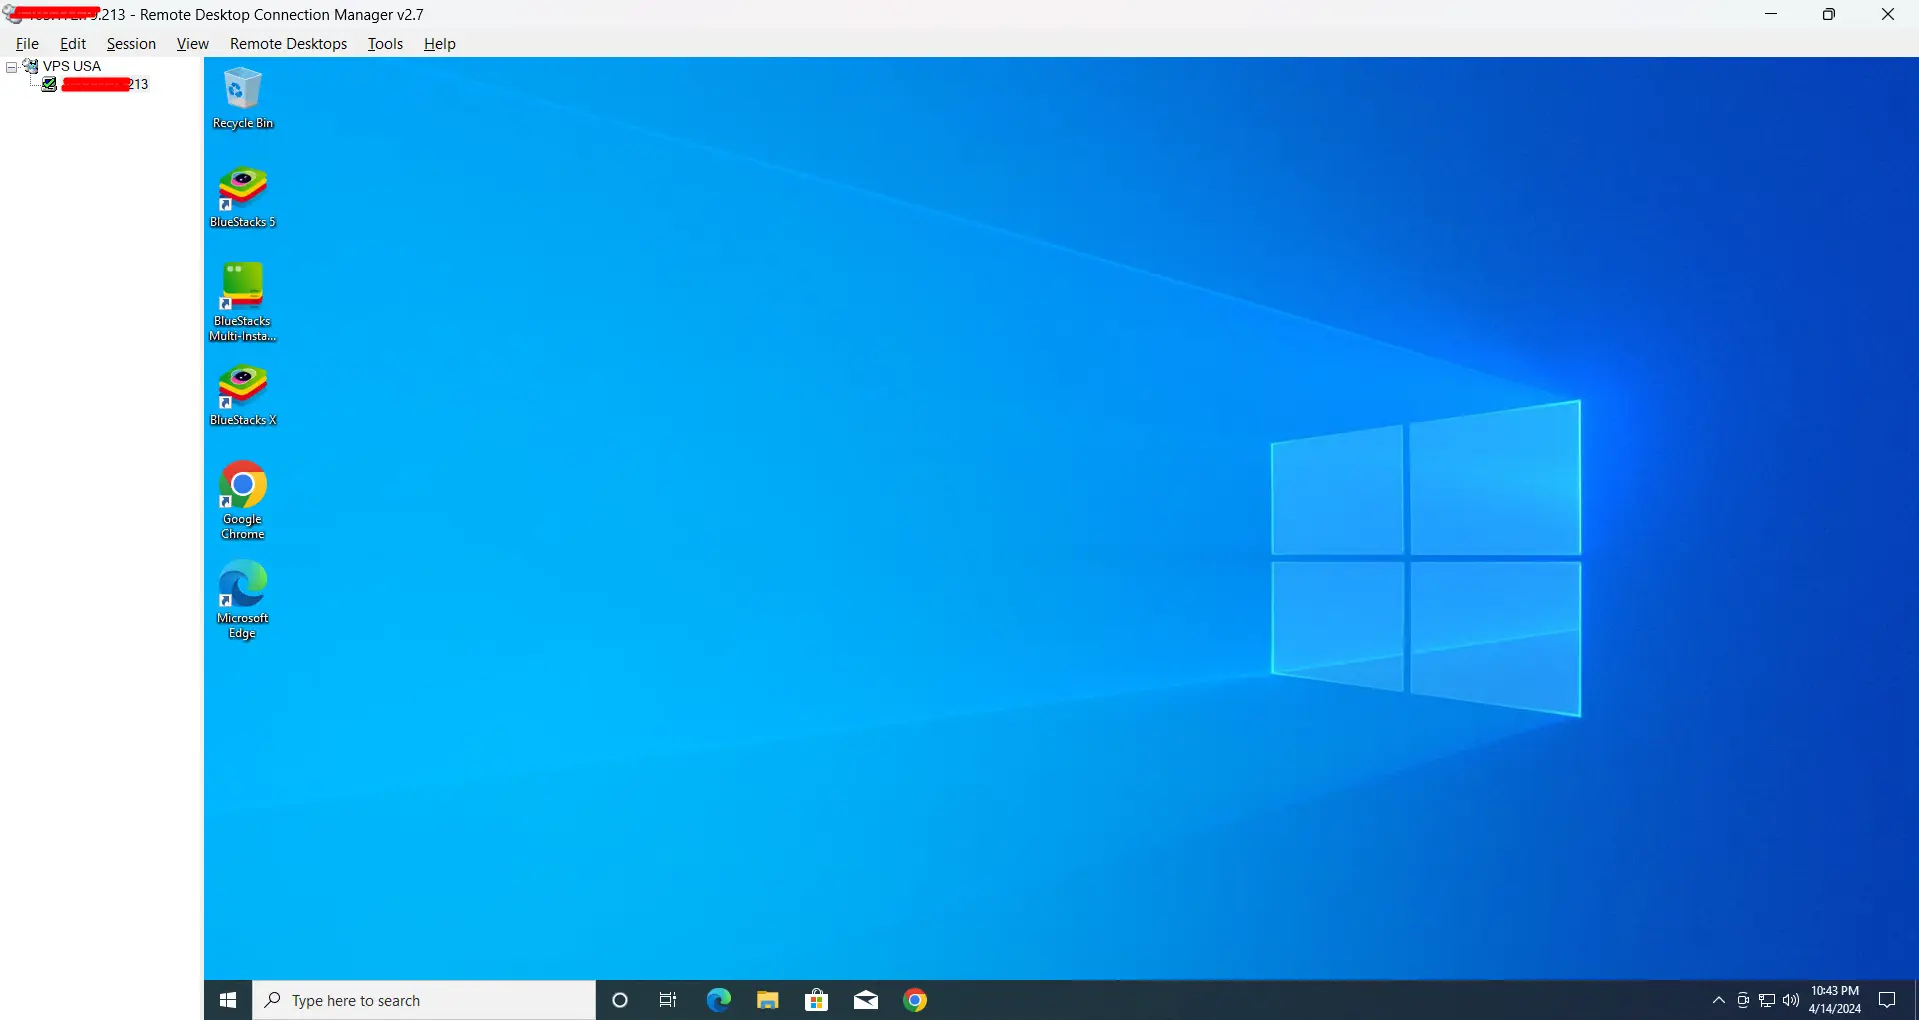
After connecting, the result will be as follows, click on IP to view the full screen.
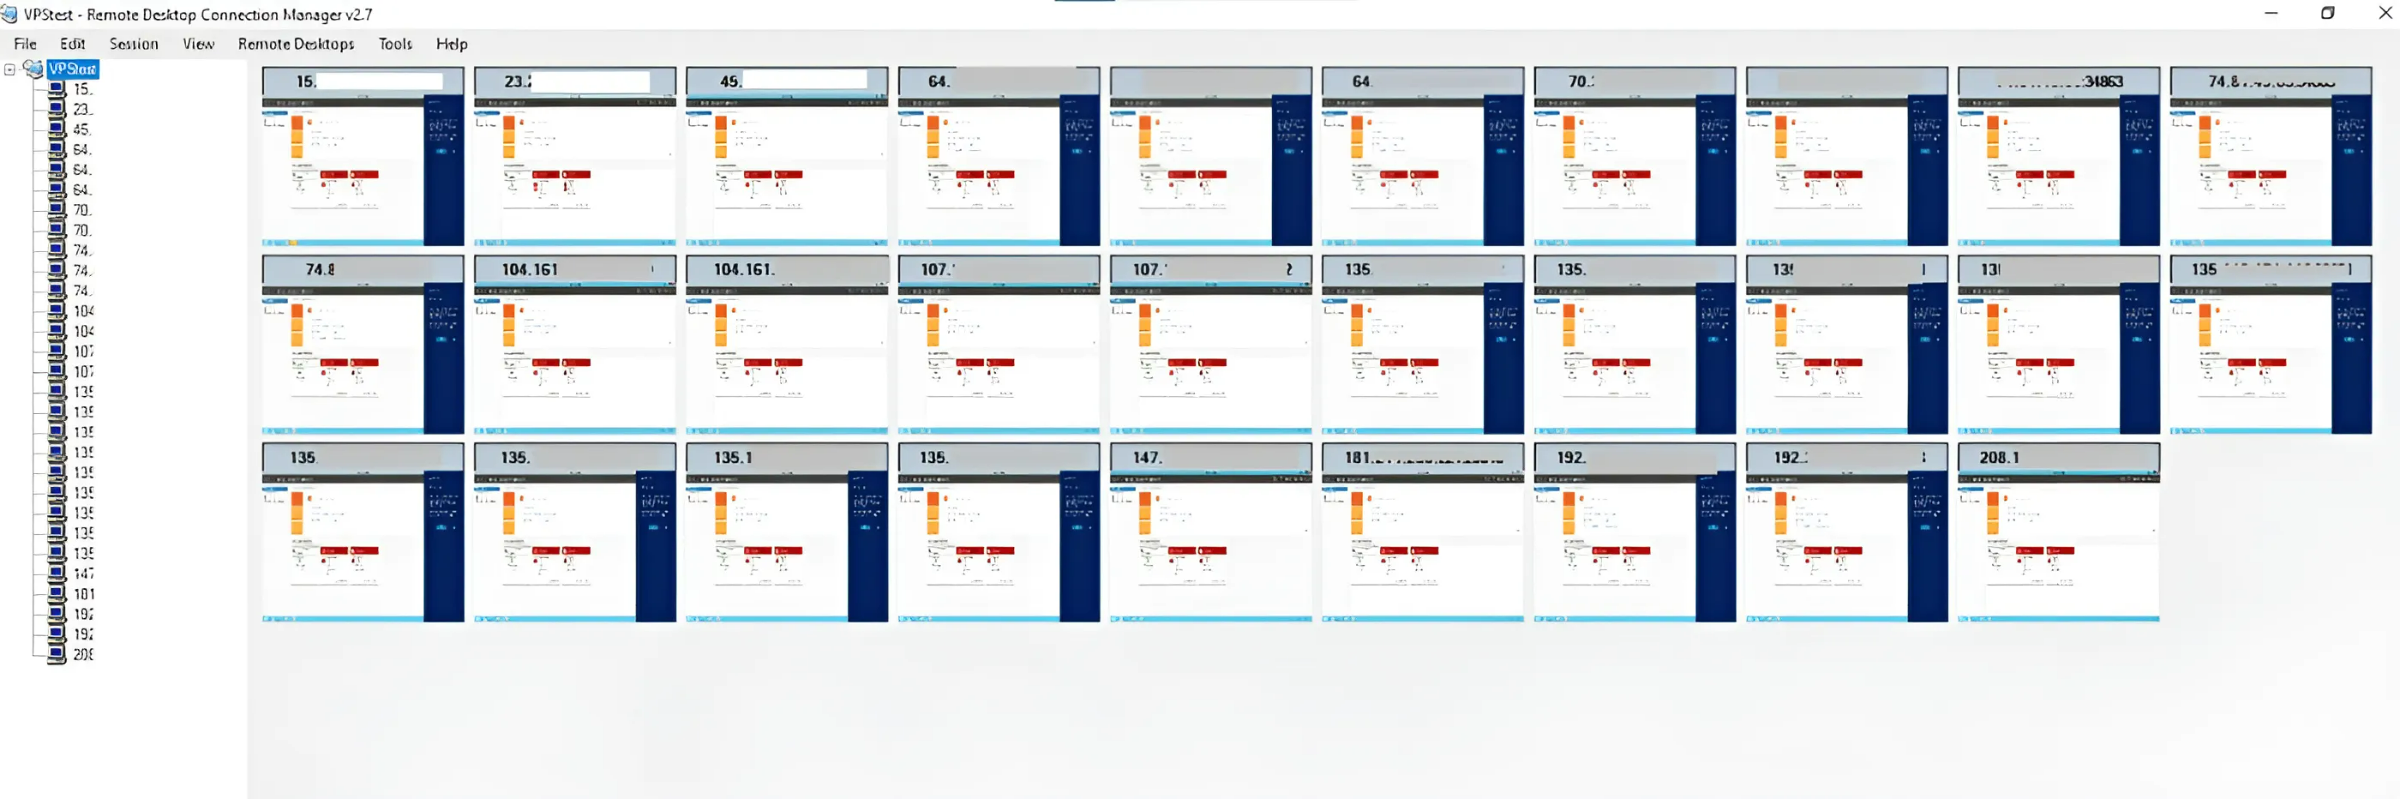
To add a new IP, you perform the same steps as above. Right-click on the newly created file name and select Add server. Below is the screen for managing multiple Windows VPS using Remote Desktop Connection Manager. If you want to disconnect any VPS, right-click and select Disconnect Server and you’re done.
After using, just select File and select Save to save the VPS information. So the next time you log in, you won’t have to fill it out from scratch. So you’ve completed the steps to log in and manage multiple Windows VPS on Remote Desktop Connection Manager.
Wish you a productive working day, and if you have any questions or requests regarding the VPS, please contact WindowsVPSCheap Customer Support for guidance.
Wish you all success!!
CATEGORY:VPS Management Windows VPS
