
A Windows VPS hard drive is a virtual storage space that houses the operating system, applications, and data for a virtual private server (VPS). Offering the flexibility and scalability of a dedicated server at a fraction of the cost, VPSs have become popular for hosting websites and applications. The process of initializing or upgrading a VPS may cause the VPS’s hard drive to be short of capacity compared to the subscribed package, so how to Extend Volume on the purchased VPS.
There are two effective methods to achieve this: using Disk Management or Server Manager on windows server. In this article, we will explore each method in detail, providing step-by-step instructions and troubleshooting tips.
Extending Windows VPS Hard Drive Using Disk Management
To extend your Windows VPS hard drive using Disk Management, follow these steps:
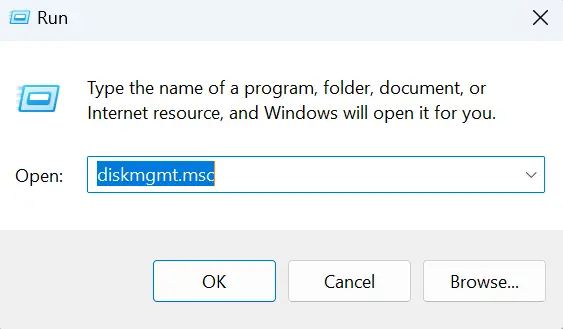
Open Disk Management by pressing Windows + R to open the Run dialog box, typing diskmgmt.msc, and pressing Enter.
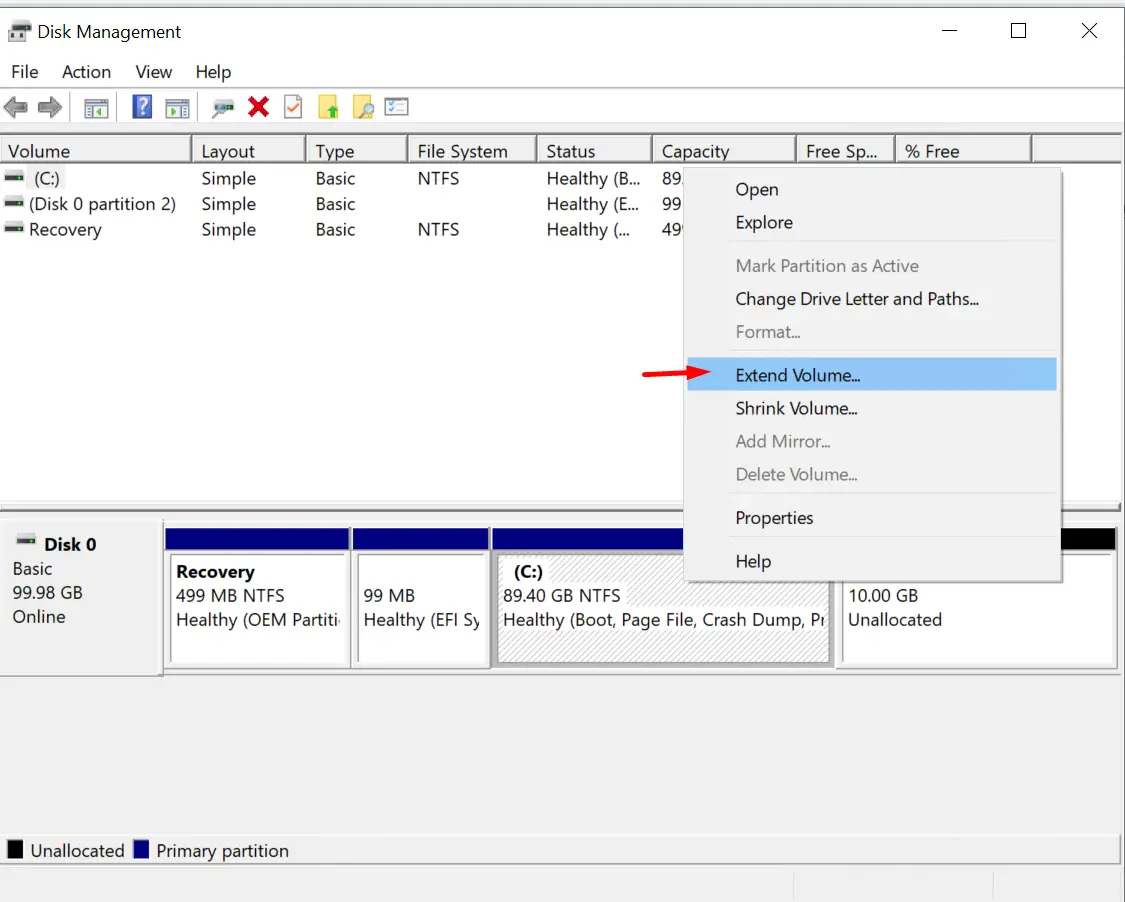
In the Disk Management window, locate and right-click on the volume that you want to extend. From the context menu, select “Extend Volume.”
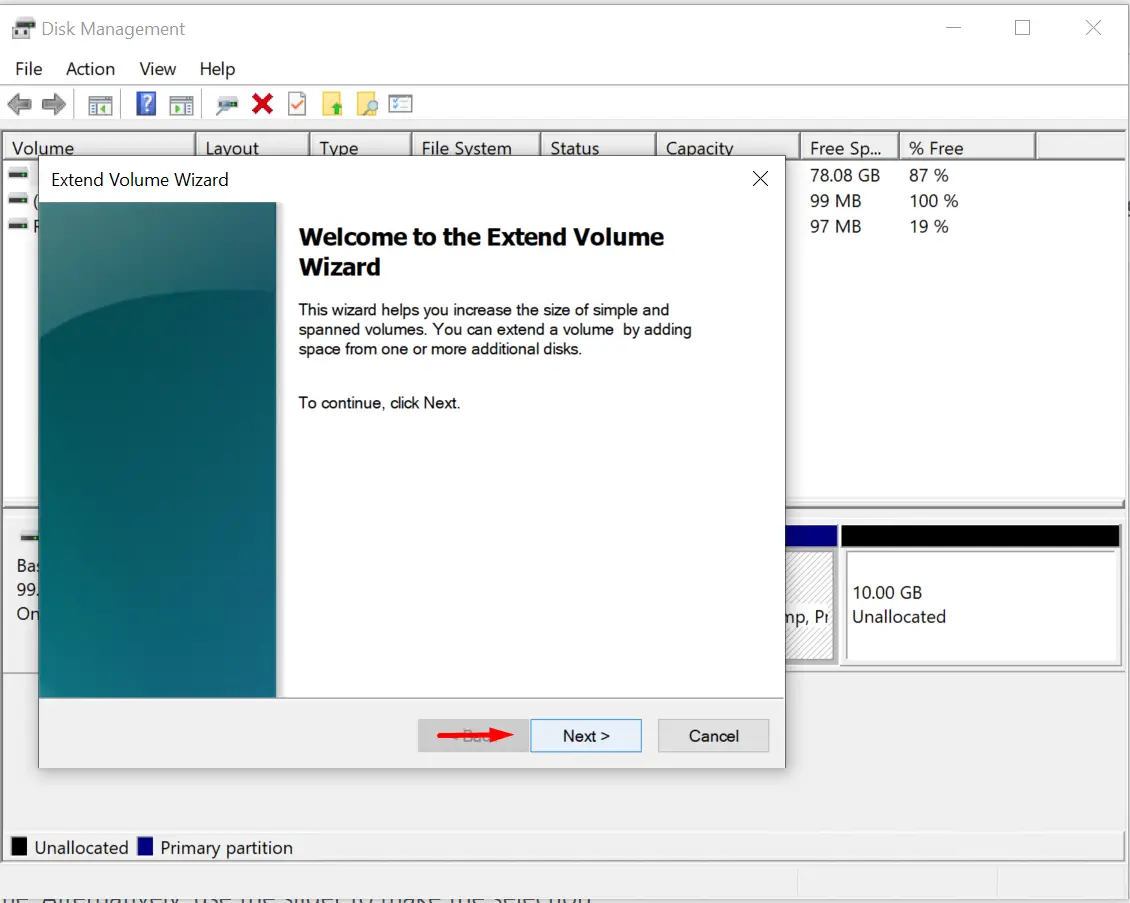
The Extend Volume Wizard will now appear. Click “Next” to proceed.
On the Select Disks screen, choose the disk that contains the unallocated space you wish to utilize for extending the volume.
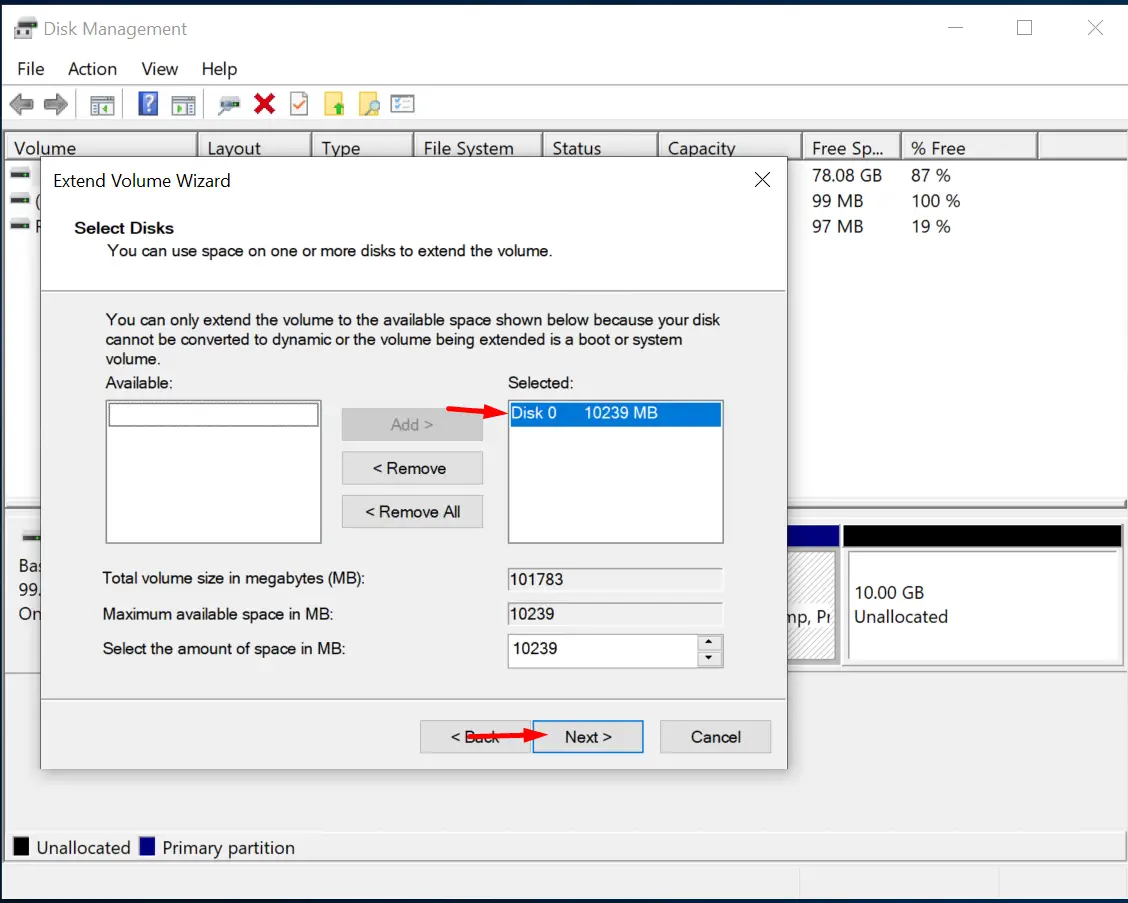
In the “Amount of space to add (MB)” field, specify the desired amount of space you want to add to the volume. Alternatively, use the slider to make the selection.
After configuring the settings, click “Next” and then “Finish” to initiate the process of extending the volume.
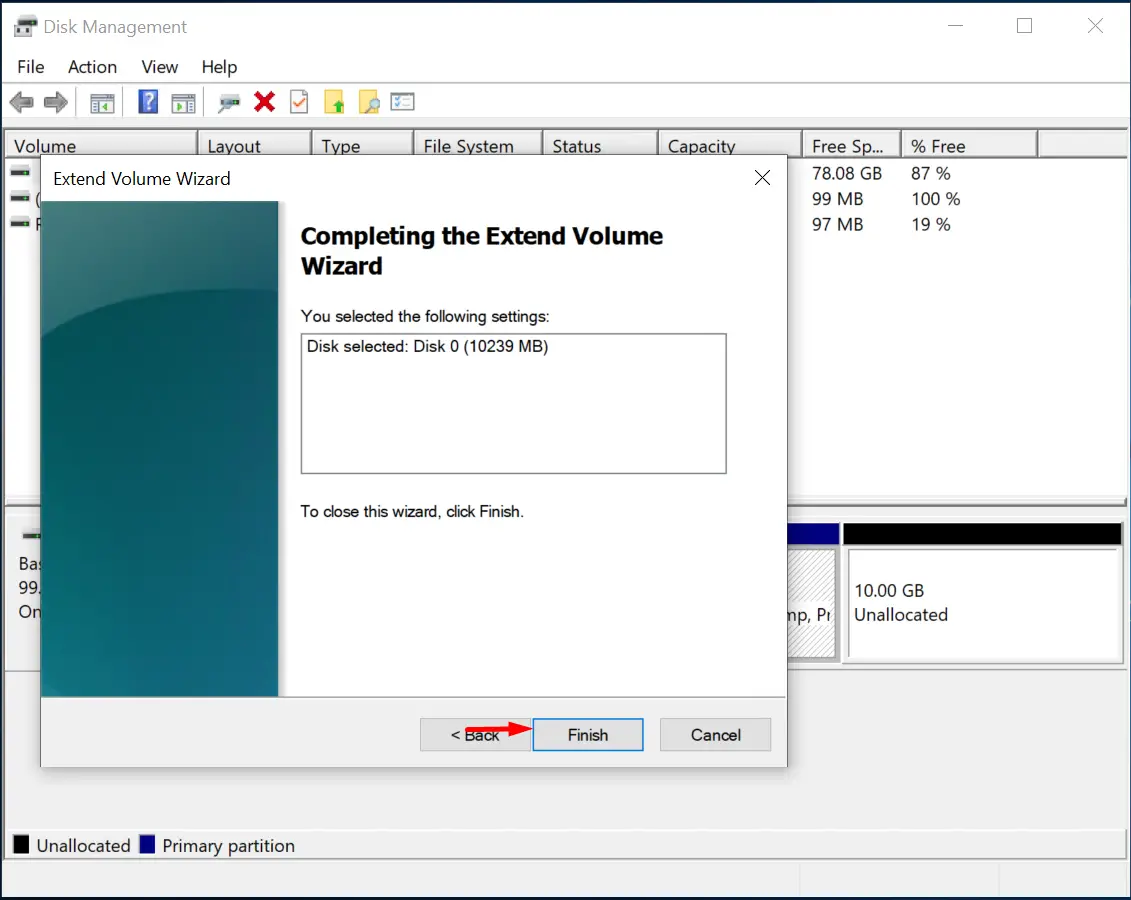
This completes the steps to extend the hard drive using Disk Management. You can check your capacity again after extend hard drive.
Extending Windows VPS Hard Drive Using Server Manager
For VPS using Windows Server 2012, Windows Server 2016, Windows Server 2019 operating systems, you can use Server Manager to expand the hard drive.
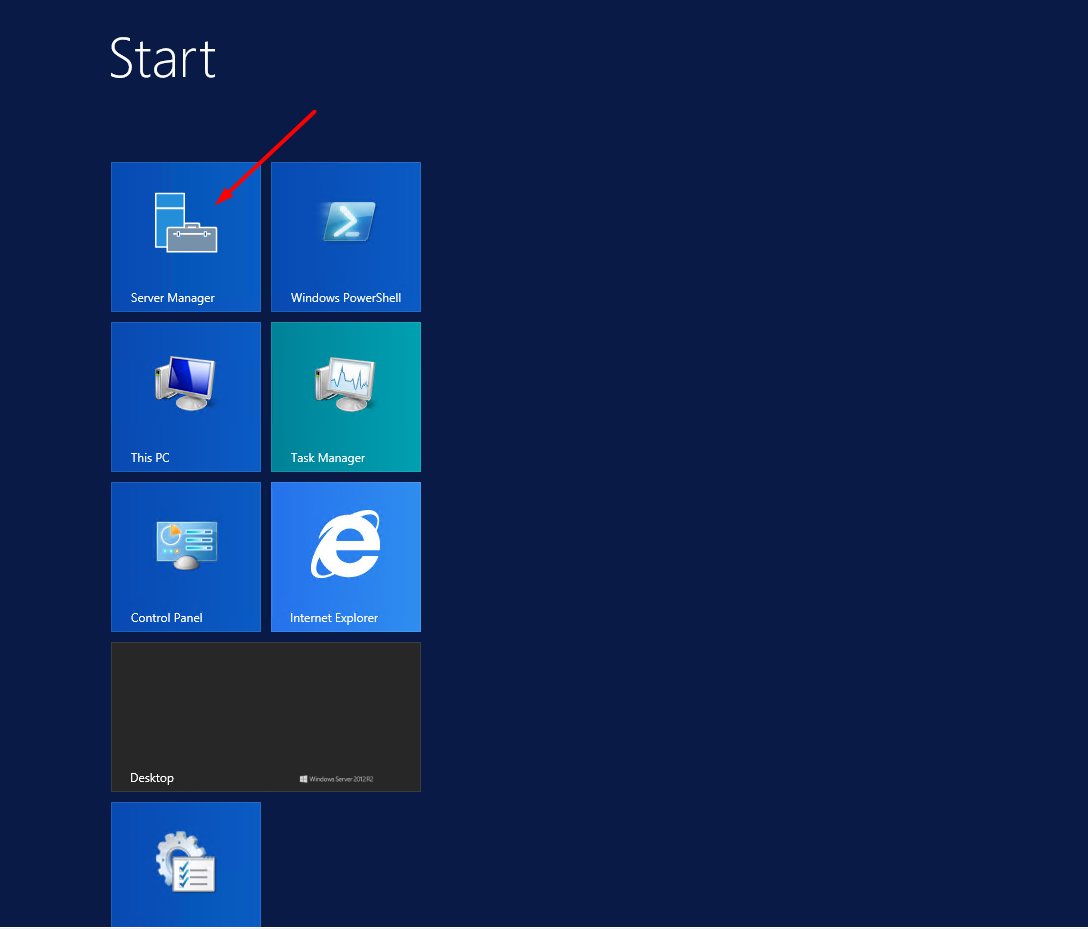
Open Server Manager by going to Start > Select Server Manager (or type Server Manager) in the search box to search.
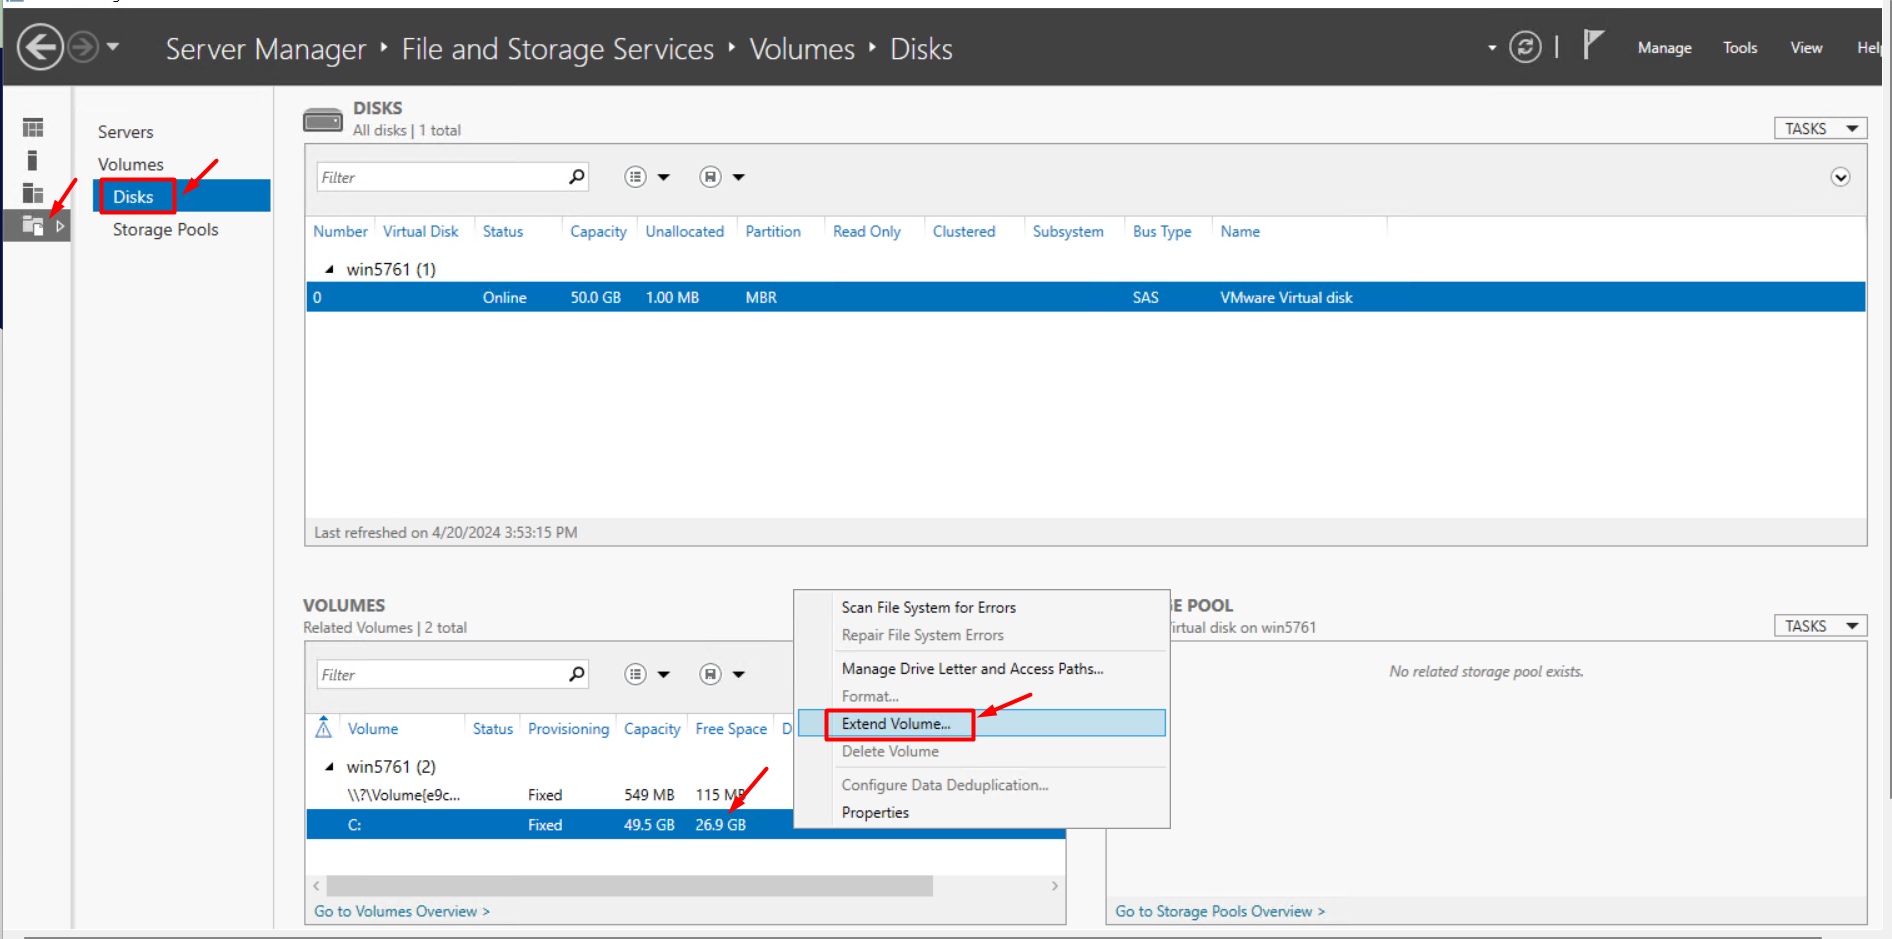
In Server Manager, select File and Storage Services.
In the File and Storage Services section, click on Disk and select the box that needs to Extend capacity. Here I choose drive C.
Right-click on the selected drive (the drive you want to extend) and choose Extend Volume.
Enter the maximum capacity number to expand the hard drive. You should choose the maximum number (Maximum Size) displayed above. If your VPS has more than one drive, divide the storage according to the ratio of drives as you wish. Usually, VPS provided by Windowsvpscheap only has one drive, which is the C drive, so you can extend this drive to the maximum.
I hope that with the concise steps above, you can expand the hard drive to the maximum according to the specifications of the VPS packages you have purchased before such as VPS Singapore, VPS US (United States). Don’t forget that at Windowsvpscheap, we provide you with a cheap Windows VPS solution, instant start-up, no hidden fees, and professional customer support.
Wish you a productive working day.
CATEGORY:Guidance
