Basic VPS security steps are the most important things you should do after purchasing a Windows VPS. You need to remember that you are active on the internet and are vulnerable to cyber attacks and malware. You are responsible for keeping your information secure in VPS. Especially with important accounts like Paypal, Amazon, Ebay,… you need to change Password, Port, Username… immediately after receiving login information to secure the VPS.
While VPS instances are generally considered safer than shared hosting due to their isolated nature, it is still possible for the security of a VPS system to be compromised. If a VPS is breached, the owner of the VPS can end up spending thousands of dollars with stolen personal and financial information, customer data loss, and destroyed website content. To prevent these types of cyber threats, it is crucial to take necessary security measures. In this article, we will discuss seven strategies you can implement to help secure your VPS from hackers, malware, and other threats.
1. Change VPS password fastest with Cmd command line on PowerShell available on VPS.
To protect your VPS, it is important to use strong and unique passwords for all accounts, including the root account and any user accounts you create. You should avoid using simple or easily guessable passwords such as “password,” “123456,” “QWERTY,” or personal information, such as your name or birthdate, in your passwords. Strong passwords are typically long, complex, and contain a mix of uppercase and lowercase letters, numbers, and special characters, for example, m#P52s@ap$V. Finally, it is important to regularly update your passwords, especially if you suspect that they may have been compromised or if you have used the same password for an extended period of time.
First, log in to the VPS using Remote Desktop Connection software, Click Start and select Windows Powershell. Next, copy the following syntax to paste into PowerShell on the newly opened VPS.
Detailed syntax for quick password change is as follows:
Net User Administrator Password
- Copy the entire line above and replace the word Password with the new password you want to change to.
For example: Net User Administrator Windowsvpscheap@1412
- Next, Paste into the Powershell opened on the VPS in step 1 by RIGHT clicking on PowerShell and pressing ENTER as shown:
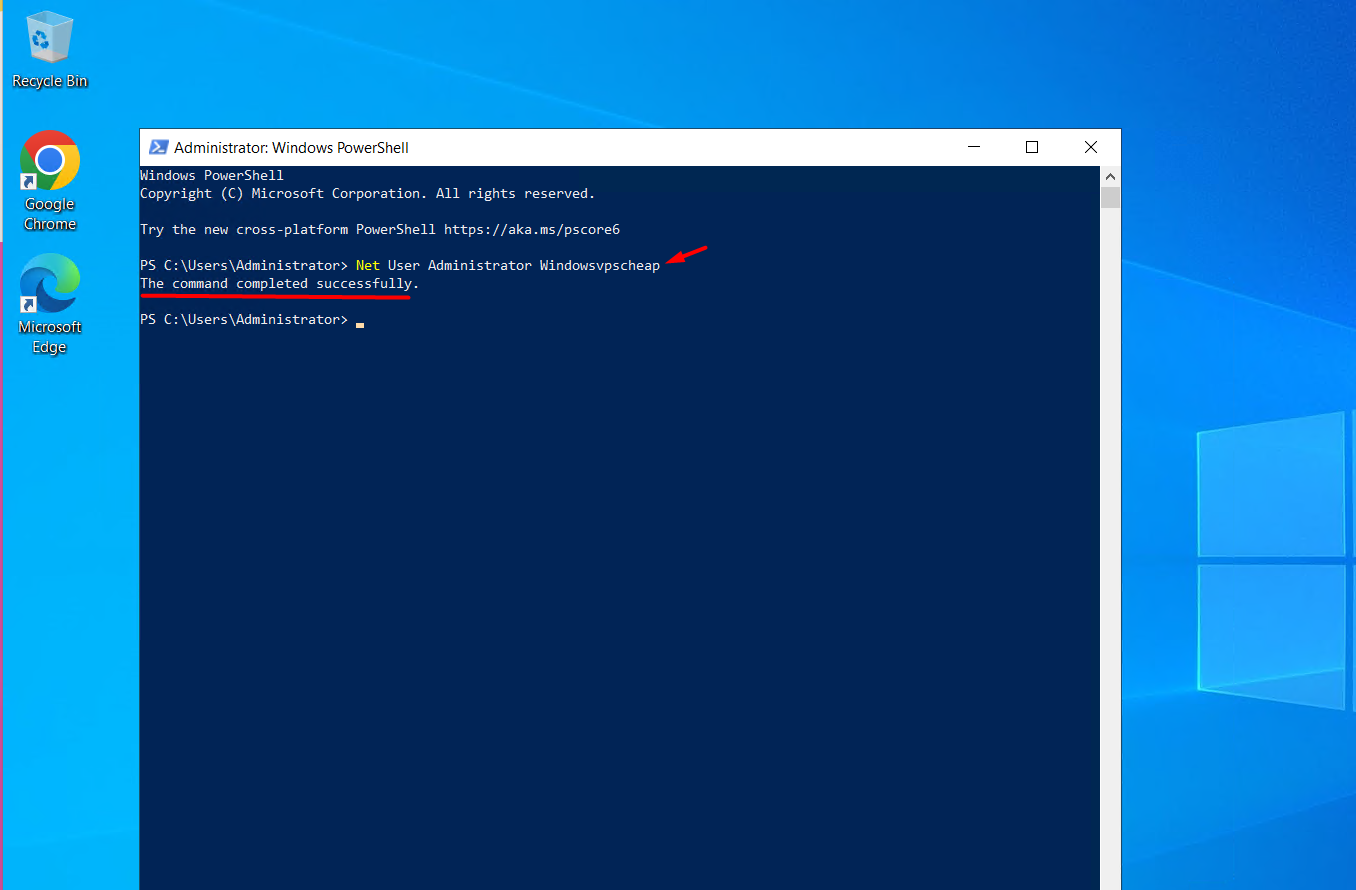
Change VPS password using PowerShell
After you press Enter, it will say that the password has been changed successfully (if incorrect, a warning will appear).
2. Change Port for Windows VPS via command line
Connecting to a VPS via RDP is a common practice among users, but it comes with a risk of becoming a victim of a brute-force attack. This is because the default port 3389 for RDP connections is well-known and frequently targeted by hackers. By probing IP addresses on these default ports, attackers can create a list of potential targets and launch brute-force attacks. Changing the default ports is a simple but effective step you can take to protect your servers from such attacks.
First, open PowerShell (Search in Start, type powershell).
Then, copy the command line below and paste the copied code into the VPS’s PowerShell. (Right click on an empty area on the Powershell window to execute the command).
netsh advfirewall firewall add rule name=”Remote Desktop Service” dir=in action=allow protocol=TCP localport=45623
Set-ItemProperty -Path HKLM:\SYSTEM\CurrentControlSet\Control\Terminal*Server\WinStations\RDP-TCP\ -Name PortNumber 45623
shutdown /r /t 0
Write-Warning “Start restarting your VPS, try again with the new Port after 30 seconds, best regards Windowsvpscheap”
Note: Port 45623 can be changed to any number between 5000 and 65000. You should choose it randomly for service security. When changing the port, remember to replace it completely because there are two places you must enter the port in the code above. Once completed, your VPS will automatically restart and you can log in again after 30 seconds.
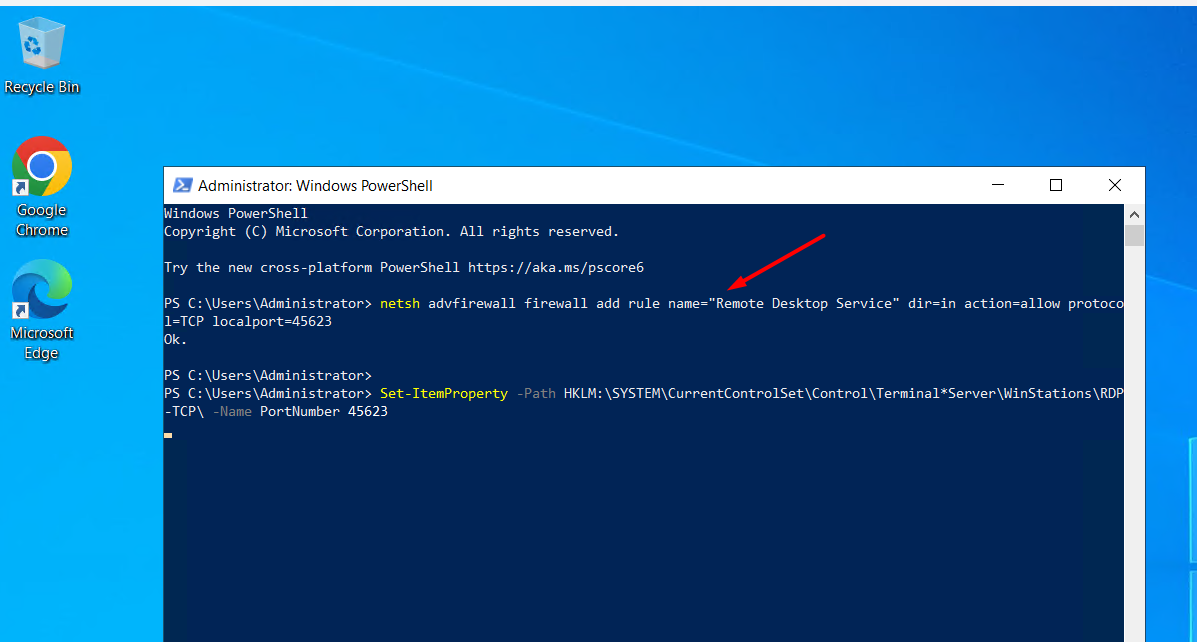
Change the default port of Windows VPS
Login into the VPS with information including the old IP + port new “:45623” extension, as shown below:
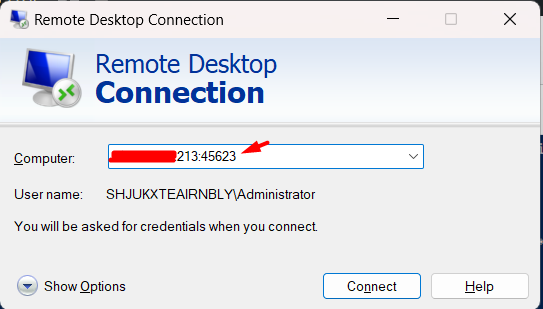
Log in to VPS using the new port
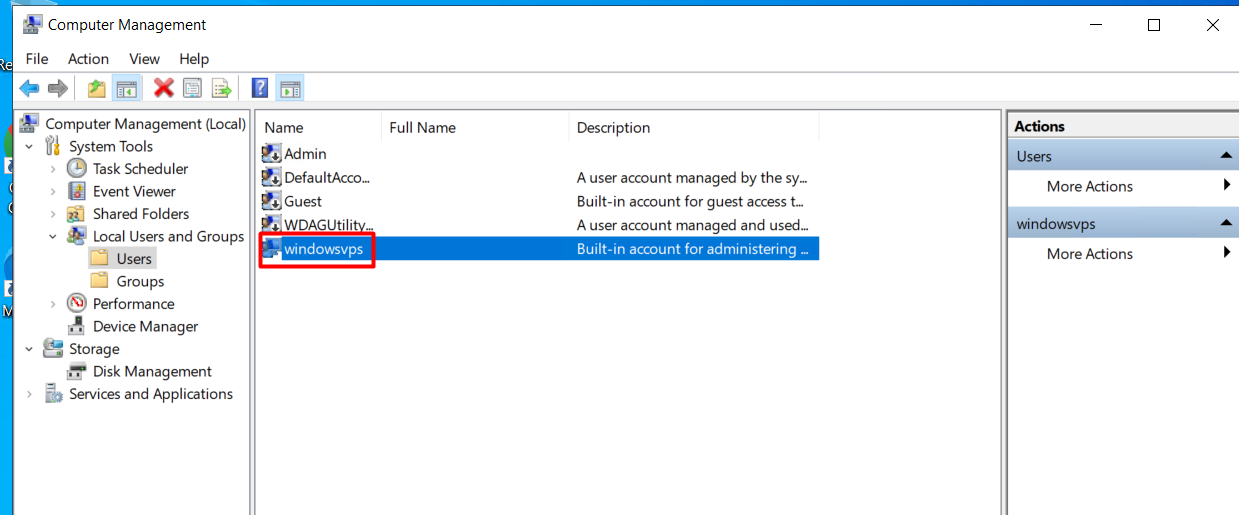
3. Change VPS Default Username to Secure Windows VPS
First, select Start, type Computer Manager -> select Local Users and Groups -> select the User folder. Right-click Administrator, then select Rename, enter the new User name and press Enter. As shown below:

Change the default VPS Username
Then you log in with the new User name you set. Here we set it as windowsvps.
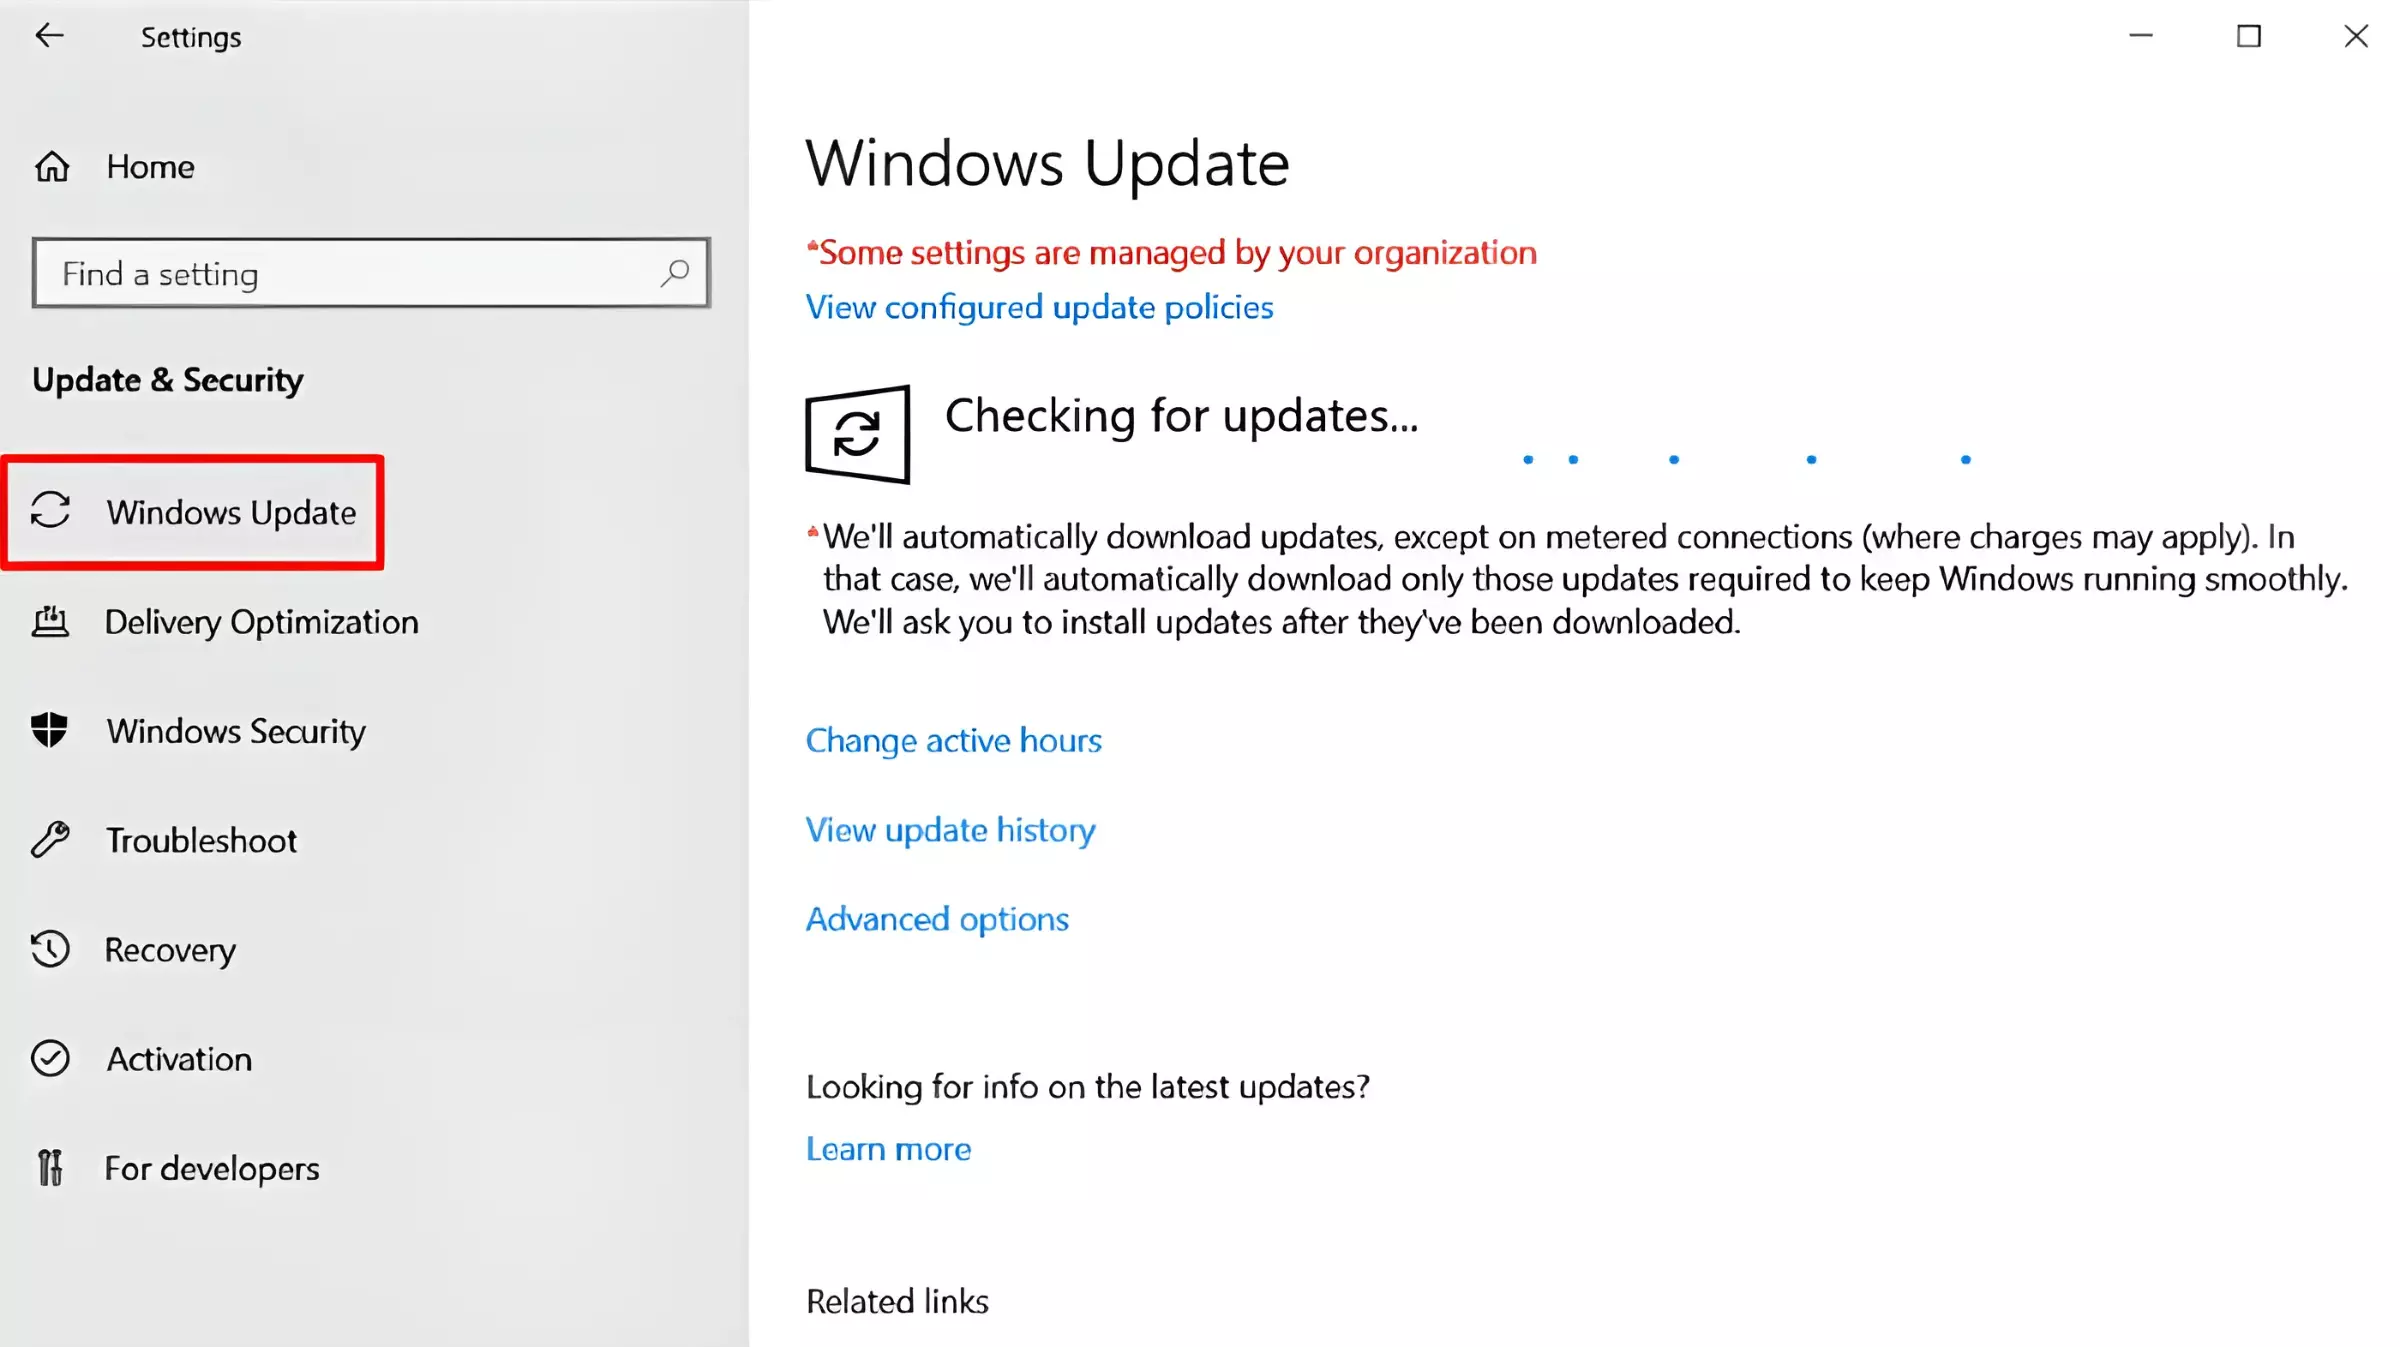
4. Keep Your System up to Date
Keeping your VPS software up to date is a crucial step in maintaining its security and protecting it against potential vulnerabilities and exploits. Outdated software can leave your system open to potential attacks by hackers or malicious software as it lacks of software updates, which often include critical security patches and bug fixes that address known vulnerabilities. End-of-life (EOL) product, such as Windows Server 2008, Windows Server 2012 and 2012 R, Windows 7 operating system, is an example of outdated software. Its vendor no longer deliver services or stop generating updates that correct flaws and protect the software from hackers. If you’re using any EOL products, it’s advised to take proactive security measures or upgrade them to newer versions/editons.
To prevent these types of security risks, it is essential to regularly update your VPS software, including the operating system and any applications or services that you are running. If possible, you can set up automatic updates. This will ensure that your system is regularly updated with the latest security patches and other critical updates without requiring you to manually check for updates and install them. In addition to updating your VPS software, it is also important to monitor for any new security alerts or advisories related to the software you are using. Keeping abreast of the latest security threats and vulnerabilities will help you take any necessary action to secure your VPS and prevent potential attacks.
5. Perform Backups Regularly
Regular backups are essential because they provide a way to recover your data in case of an emergency or disaster. Many events such as system crashes, malware infections, and hard drive corruption & failure can cause inevitable data loss. Aside from these situations, you may also face the same problem when performing upgrades/downgrades. If your VPS experiences a hardware failure, for example, you can use your backups to restore your data to a new VPS. Similarly, if your data is lost or corrupted due to a security breach, you can use your backups to restore the data to a previous, unaffected state.
To back up your data, you can use a variety of tools and methods, such as manual backups or automated backups using backup software. You can also choose to store your backups in a variety of locations, such as a cloud storage service, an external hard drive, or a physical backup server located off-site.
6. Enable Firewall
A firewall provides network security by filtering incoming and outgoing traffic based on user-defined rules. In general, the purpose of a firewall is to shield your network from malicious or unnecessary network traffic. By blocking traffic that does not meet the security criteria, a firewall can help prevent unauthorized access to your VPS and protect it from potential security threats.
There are different types of firewalls you can use to secure your VPS, including network-based firewalls and host-based firewalls. Network-based firewalls are typically installed at the network perimeter and protect multiple hosts or devices, while host-based firewalls are installed on individual hosts or devices to regulate traffic to and from that host.
To enable a firewall on your VPS, you can use the built-in firewall software that comes with your operating system, or install a third-party firewall solution. When you set up a firewall, you can define the rules that determine which traffic is allowed and which is blocked. For example, you can block traffic from specific IP addresses or ports, or restrict traffic to specific protocols or services. This can help prevent malicious traffic from reaching your VPS, such as traffic generated by a distributed denial-of-service (DDoS) attack or other types of malware. Once you have configured your firewall, it is important to regularly review and update the rules to ensure that they are up to date and effective in protecting your VPS against potential security threats.
Wrap up
Securing your VPS is essential to protect your data and ensure that your server remains up and running. In this article, we have discussed 6 ways to secure VPS, including using strong passwords, enabling a firewall, change Default RDP Port, and performing regular backup to a secure off-site location. By following these best practices, you can help protect your VPS from potential security threats, such as unauthorized access, data loss, or corruption. Additionally, it is important to keep your security settings up to date and stay informed about new security threats and vulnerabilities to ensure that your VPS remains secure over time.
Wish you a productive working day, and if you have any questions or requests regarding the VPS, please contact WindowsVPSCheap Customer Support for guidance.
Sincerely thank you!
CATEGORY:Guidance
